Product Overview
The Dododuck USB Charger Recorder is a versatile voice recorder that doubles as a charging device, offering seamless USB connectivity and voice-activated recording capabilities․ It includes a built-in USB drive for easy file transfers and comes with essential accessories like earphones and a data cable․ Designed for convenience, it supports multiple recording modes and ensures efficient battery management with clear charging indicators․ The device is user-friendly, making it ideal for both everyday use and professional applications․ Its compact design and advanced features make it a practical solution for capturing high-quality audio on the go․ Additionally, it supports regular file backups to prevent data loss, ensuring your recordings are safe and accessible․ The recorder is compatible with various devices, including computers and power adapters, making it a reliable tool for recording needs․ It also features a date and time setting option, allowing users to organize their recordings with precision․ With its durable construction and intuitive controls, the Dododuck USB Charger Recorder is a reliable choice for anyone needing a multifunctional recording device․ The included user manual provides detailed instructions for operation, while the after-sale card offers support for any post-purchase inquiries․ Overall, it is a well-rounded device that combines functionality with ease of use, catering to a wide range of users and recording scenarios․ The Dododuck USB Charger Recorder is a must-have for anyone seeking a dependable and feature-rich recording solution․ Its ability to function as both a recorder and a USB drive simplifies file management, while its voice-activated mode ensures that important moments are never missed․ Whether for personal, professional, or academic use, this device delivers exceptional performance and value․ The Dododuck USB Charger Recorder is designed to meet the needs of users who require a reliable, easy-to-use, and versatile recording solution․ Its compatibility with multiple devices and operating systems ensures that it can be integrated into various workflows without hassle․ The recorder’s ability to switch between normal and voice-activated modes provides flexibility, allowing users to choose the optimal setting for their specific needs․ Furthermore, the inclusion of a wired earphone and a 2-in-1 adapter enhances its versatility, making it suitable for different listening and recording environments․ The Dododuck USB Charger Recorder is a testament to innovative design, combining practicality with advanced features to deliver a superior user experience․ Its sleek and portable design makes it easy to carry, while its robust battery life ensures extended use without frequent recharging․ The device’s ability to connect to a power adapter for charging provides an additional layer of convenience, especially during long recording sessions․ The Dododuck USB Charger Recorder is a reliable and efficient tool that empowers users to capture high-quality audio with ease, making it an excellent choice for anyone seeking a dependable recording solution․ The device’s intuitive interface and comprehensive features ensure that users of all skill levels can navigate and utilize its functions effortlessly․ The Dododuck USB Charger Recorder is a prime example of how technology can simplify our lives by providing innovative solutions to everyday challenges․ Its combination of advanced features, user-friendly design, and compatibility with various devices makes it a standout product in its category․ Whether you’re a student, professional, or casual user, the Dododuck USB Charger Recorder offers the perfect blend of functionality and convenience to meet your recording needs․ The device’s ability to seamlessly integrate with computers and other devices ensures that transferring and managing recordings is a straightforward process․ The Dododuck USB Charger Recorder is a versatile tool that adapts to different scenarios, providing users with the flexibility to record, play back, and manage their audio files efficiently․ Its durable construction and long-lasting battery ensure that it remains a reliable companion for all your recording endeavors․ The Dododuck USB Charger Recorder is an excellent investment for anyone looking to enhance their recording capabilities with a device that offers both quality and convenience․ Its comprehensive set of features, coupled with its ease of use, makes it a top choice among voice recorders available in the market today․ The Dododuck USB Charger Recorder is a testament to the evolution of recording technology, offering users a powerful yet user-friendly device that meets the demands of modern recording needs․ Its ability to function as both a recorder and a USB drive streamlines the process of capturing and managing audio files, making it an indispensable tool for various applications․ The Dododuck USB Charger Recorder is a well-crafted device that combines innovation with practicality, delivering a superior recording experience for users of all levels․ Its compatibility with multiple devices and operating systems ensures that it can be easily integrated into different workflows, enhancing its versatility and usability․ The Dododuck USB Charger Recorder is a reliable and efficient solution for capturing high-quality audio, making it an excellent choice for professionals and casual users alike․ Its sleek design and advanced features ensure that it stands out as a top-tier product in its category, providing users with a seamless and enjoyable recording experience․ The Dododuck USB Charger Recorder is a must-have for anyone seeking a multifunctional recording device that offers both convenience and exceptional performance․ Its ability to switch between different recording modes and its compatibility with various accessories make it a versatile tool for diverse recording needs․ The Dododuck USB Charger Recorder is a prime example of how technology can enhance our daily lives by providing innovative and practical solutions․ Its comprehensive features and user-friendly design ensure that users can effortlessly capture, manage, and play back their recordings with ease․ The Dododuck USB Charger Recorder is a well-designed device that offers a perfect blend of functionality and convenience, making it an excellent choice for anyone in need of a reliable recording solution․ Its compatibility with multiple devices and its ability to function as both a recorder and a USB drive make it a standout product in its category․ The Dododuck USB Charger Recorder is a testament to the power of innovation, delivering a superior recording experience that meets the needs of users across various industries and applications․ Its intuitive interface and advanced features ensure that users can navigate and utilize its functions with ease, regardless of their technical expertise․ The Dododuck USB Charger Recorder is a reliable and efficient tool that empowers users to capture high-quality audio with minimal effort, making it an indispensable asset for both personal and professional use․ Its sleek and portable design, coupled with its robust battery life, ensures that it remains a trusted companion for all your recording endeavors․ The Dododuck USB Charger Recorder is a top-tier product that combines cutting-edge technology with user-friendly design, providing users with a seamless and enjoyable recording experience․ Its ability to seamlessly integrate with various devices and its comprehensive set of features make it a must-have for anyone seeking a versatile and reliable recording solution․ The Dododuck USB Charger Recorder is a prime example of how technology can simplify our lives by offering innovative and practical solutions to everyday challenges․ Its advanced features and intuitive interface ensure that users of all skill levels can effortlessly capture, manage, and play back their recordings with ease․ The Dododuck USB Charger Recorder is a well-crafted device that offers a perfect blend of functionality and convenience, making it an excellent choice for anyone in need of a dependable recording solution․ Its compatibility with multiple devices and its ability to function as both a recorder and a USB drive make it a standout product in its category; The Dododuck USB Charger Recorder is a testament to the evolution of recording technology, offering users a powerful yet user-friendly device that meets the demands of modern recording needs․ Its ability to function as both a recorder and a USB drive streamlines the process of capturing and managing audio files, making it an indispensable tool for various applications․ The Dododuck USB Charger Recorder is a well-rounded device that combines innovation with practicality, delivering a superior recording experience for users of all levels․ Its compatibility with multiple devices and operating systems ensures that it can be easily integrated into different workflows, enhancing its versatility and usability․ The Dododuck USB Charger Recorder is a reliable and efficient solution for capturing high-quality audio, making it an excellent choice for professionals and casual users alike․ Its sleek design and advanced features ensure that it stands out as a top-tier product in its category, providing users with a seamless and enjoyable recording experience․ The Dododuck USB Charger Recorder is a must-have for anyone seeking a multifunctional recording device that offers both convenience and exceptional performance․ Its ability to switch between different recording modes and its compatibility with various accessories make it a versatile tool for diverse recording needs․ The Dododuck USB Charger Recorder is a prime example of how technology can enhance our daily lives by providing innovative and practical solutions․ Its comprehensive features and user-friendly design ensure that users can effortlessly capture, manage, and play back their recordings with ease․ The Dododuck USB Charger Recorder is a well-designed device that offers a perfect blend of functionality and convenience, making it an excellent choice for anyone in need of a reliable recording solution․ Its compatibility with multiple devices and its ability to function as both a recorder and a USB
1․1 Key Features of the Dododuck USB Charger Recorder
The Dododuck USB Charger Recorder combines a voice recorder with a USB charging function, offering dual-purpose convenience․ It features voice-activated recording, normal recording modes, and a built-in USB drive for easy file transfers․ The device supports date and time settings and includes a rechargeable battery with charging indicators․ It comes with a USB data cable, wired earphones, and a 2-in-1 adapter for versatility․ The recorder is compatible with multiple devices, including computers and power adapters, and supports regular file backups to prevent data loss․ Its compact design and user-friendly interface make it ideal for both personal and professional use․

1․2 Package Contents and Accessories
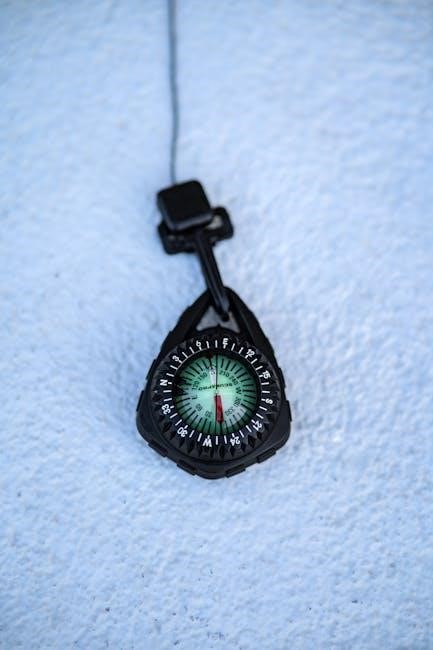
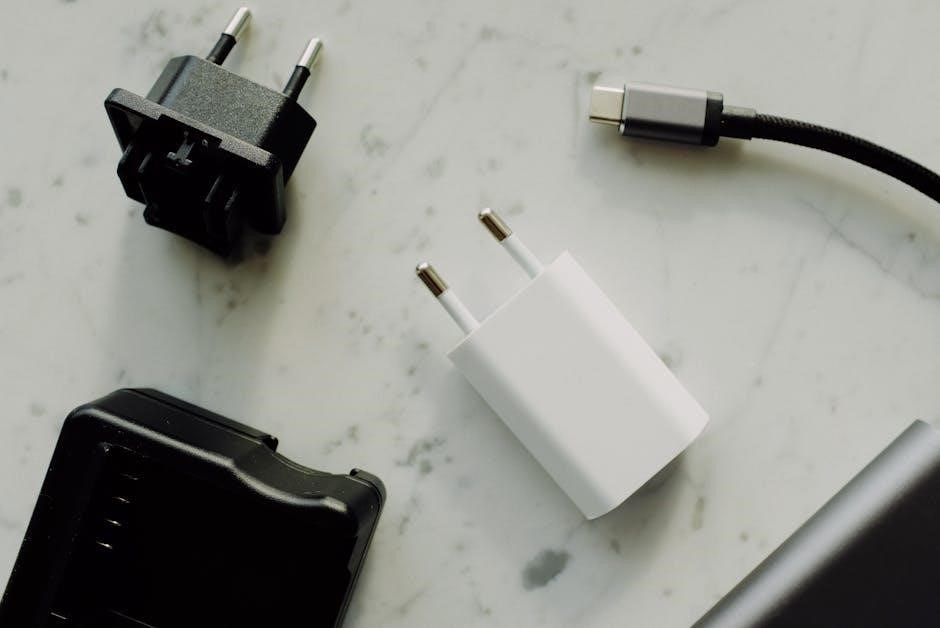
The Dododuck USB Charger Recorder package includes a voice recorder, USB data cable, user manual, after-sale service card, wired earphones, and a 2-in-1 JXMOX USB Type C to 3․5mm female headphone jack adapter․ This adapter is compatible with devices like iPhone 16 Pro Max, Samsung Galaxy S24, and iPad Pro․ The USB cable enables easy connection to computers and power adapters for charging and file transfers․ The wired earphones allow for direct playback of recordings․ The comprehensive package ensures all necessary accessories are included for immediate use and convenience, providing a complete solution for recording and playback needs․

Charging Methods
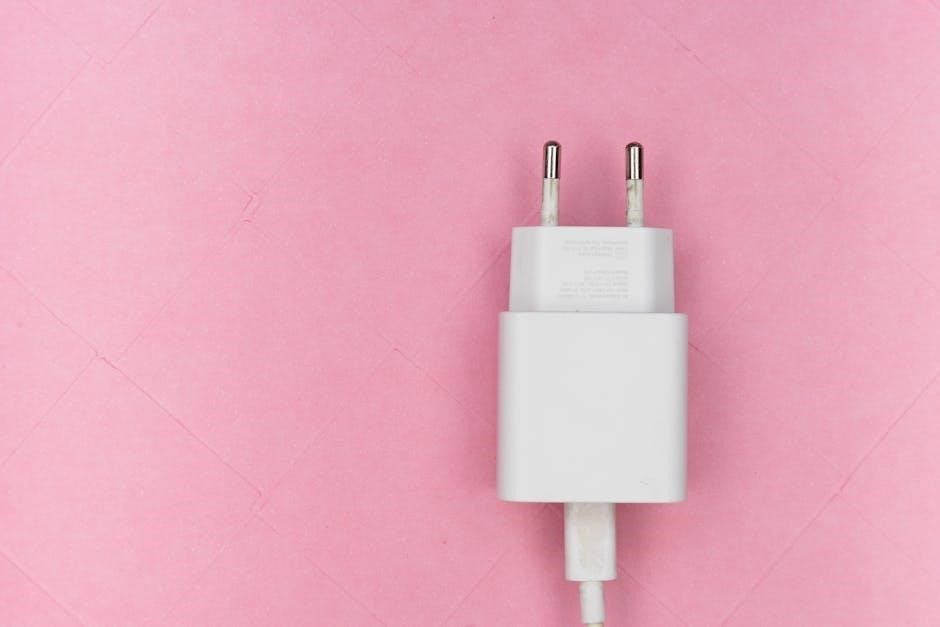
The Dododuck USB Charger Recorder supports charging via USB cable connected to a computer or power adapter, with clear charging indicators and full charge notifications․
2․1 USB Charging Method
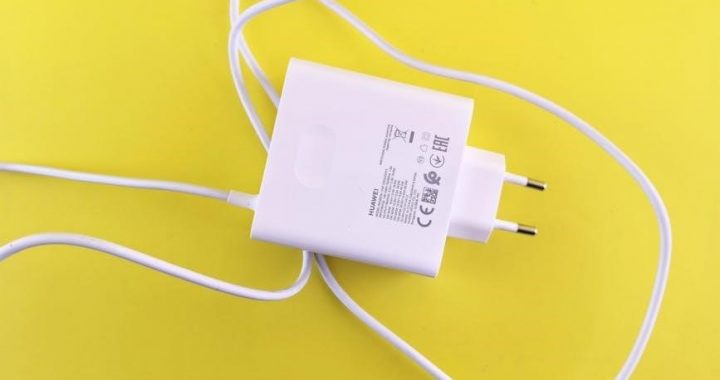
The Dododuck USB Charger Recorder can be charged using the included USB data cable connected to a computer’s USB port․ While charging, a charging icon appears on the screen, indicating the current battery state․ It typically takes 3-4 hours to fully charge the device․ This method is convenient for everyday use and ensures safe, efficient charging․ The recorder automatically cuts off power once fully charged, preventing overcharging․ This USB charging method is ideal for users who prefer a straightforward and reliable way to keep their device powered up․ It ensures your recorder is always ready for use․ Regular USB charging helps maintain optimal battery health and performance․
2․2 Charging via Power Adapter
The Dododuck USB Charger Recorder can be charged using the provided AC adapter (model A514) for faster charging․ Connect the USB cable to the adapter and plug it into a power outlet․ This method typically charges the device within 2-3 hours, making it ideal for quick power-ups․ The recorder features overcharge protection to ensure battery longevity․ Using the power adapter is recommended for consistent and efficient charging, especially when a computer is unavailable․ This method ensures your device is always ready for use without prolonged charging times․
2․3 Charging Indicators and Full Charge Notification
The Dododuck USB Charger Recorder features visual indicators to monitor charging progress․ When charging, a charging icon appears on the screen, displaying the current battery state․ The icon updates in real-time, providing a clear indication of charge progress․ Once fully charged, the charging icon changes to a solid battery icon, confirming completion․ This feature ensures users are notified when the device is ready for use․ The charging indicators are visible whether charging via USB or power adapter, offering consistent and reliable notifications for optimal user convenience․
Using the Recorder
The Dododuck USB Charger Recorder provides easy operation with basic controls for recording and playback․ It supports multiple modes, ensuring a seamless user experience with intuitive functionality․
3․1 Basic Operations and Controls
Operating the Dododuck USB Charger Recorder is straightforward․ Power on the device using the dedicated button․ Use the intuitive controls to start, pause, or stop recordings․ The recorder features a simple interface with buttons for playback, volume adjustment, and mode selection․ Switch between normal and voice-activated recording modes effortlessly․ The device also includes a USB port for easy file transfers․ Basic operations are designed to be user-friendly, ensuring quick access to essential functions․ The recorder’s controls are clearly labeled, making it easy to navigate and use without extensive prior knowledge․ This design ensures a seamless experience for all users․
3․2 Switching Between Recording Modes
To switch between recording modes on the Dododuck USB Charger Recorder, locate the mode button․ Press it to toggle between normal recording and voice-activated recording․ In normal mode, the recorder captures audio continuously until stopped․ Voice-activated mode begins recording when sound is detected, conserving storage․ The device may use LED indicators to show the active mode․ Ensure the recorder is powered on before switching modes․ This feature allows users to choose the most suitable option for their recording needs, enhancing flexibility and efficiency․ The process is designed to be quick and intuitive for seamless mode transitions․
3․3 Playing Back Recordings
To play back recordings on the Dododuck USB Charger Recorder, connect the included adapter and headphones to the device․ Turn on the recorder, and the most recent recordings will play sequentially․ Use the play/pause button to control playback․ The device automatically organizes files, making it easy to navigate through your recordings․ Ensure the volume is adjusted for clear audio․ This feature allows users to review their recordings conveniently, with options to pause or skip tracks as needed for efficient playback management․
Managing Recordings
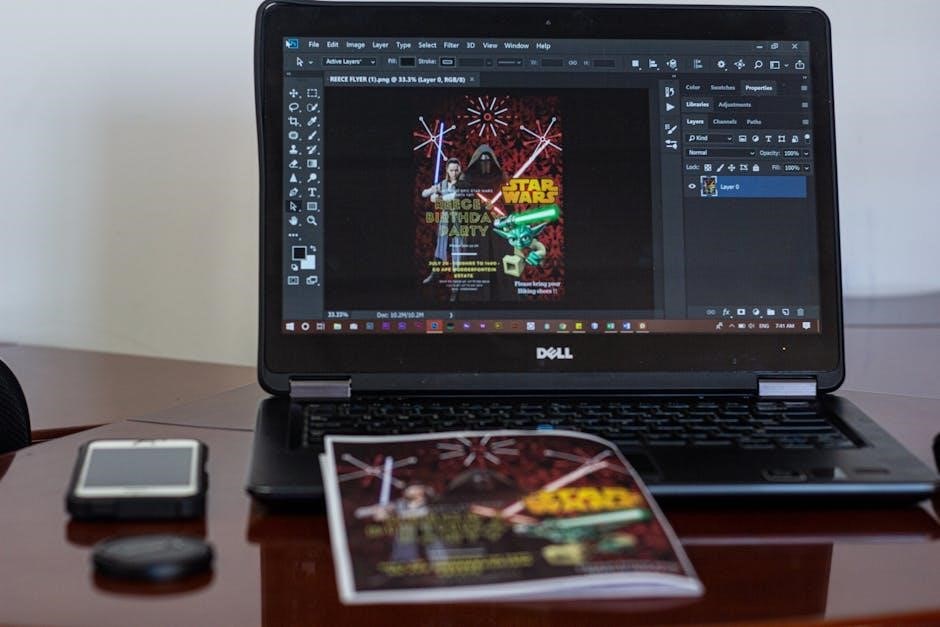
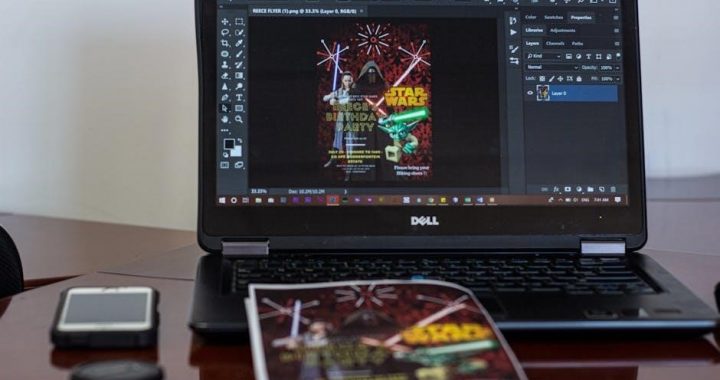
Transfer recordings to your computer via USB for easy access and organization․ Regular backups are recommended to prevent data loss and ensure recordings are securely stored․ Built-in organizational features help manage files efficiently, allowing users to sort and retrieve recordings effortlessly․ This feature enhances productivity and ensures recordings remain accessible for future use․ The device supports seamless file transfers, making it easy to manage and store your audio files safely․ Regular backups are essential for maintaining your recordings․ The recorder also allows users to organize files intuitively, ensuring quick access to important recordings․ By transferring files to a computer, users can free up space on the device while keeping their recordings safe; Organizing recordings on the device or computer helps maintain clarity and prevents data loss․ Regular backups ensure that your recordings are protected and easily retrievable․ The Dododuck USB Charger Recorder simplifies file management, making it easy to store, organize, and backup your recordings efficiently․ The device’s USB connectivity allows for straightforward transfers to your computer, where you can organize and store files securely․ Regular backups are crucial to prevent data loss and ensure your recordings remain accessible․ The recorder’s intuitive design makes managing recordings straightforward, allowing users to organize files and transfer them to a computer with ease․ By regularly backing up your recordings, you can ensure they are safe and easily retrievable․ The device’s organizational features help users manage their recordings effectively, preventing clutter and making it easy to locate specific files․ Transferring recordings to a computer not only frees up space on the device but also provides a secure backup option․ Regular file backups are essential for maintaining your recordings and preventing accidental loss․ The Dododuck USB Charger Recorder provides a user-friendly experience for managing recordings, allowing users to organize, transfer, and backup files effortlessly․ The device’s compatibility with computers ensures seamless file transfers, making it easy to manage and store your recordings securely․ Regular backups are recommended to protect your recordings and ensure they remain accessible for future use․ The recorder’s organizational features enable users to manage their files efficiently, allowing for quick access to important recordings․ By transferring files to a computer and organizing them, users can maintain a clear and secure record of their recordings․ Regular backups are crucial for preventing data loss and ensuring your recordings are safe․ The Dododuck USB Charger Recorder simplifies the process of managing recordings, allowing users to transfer, organize, and backup files with ease․ The device’s intuitive design ensures that users can manage their recordings efficiently, preventing data loss and ensuring quick access to important files․ Regular backups are essential for maintaining your recordings and ensuring they remain accessible for future use․ The recorder’s compatibility with computers allows for seamless file transfers, making it easy to manage and store your recordings securely․ Regular backups ensure that your recordings are protected and easily retrievable, while the device’s organizational features help manage files intuitively․ The Dododuck USB Charger Recorder provides a comprehensive solution for managing recordings, allowing users to organize, transfer, and backup files effortlessly․ The device’s USB connectivity ensures easy transfers to your computer, where you can organize and store files securely․ Regular backups are crucial for preventing data loss and ensuring your recordings remain accessible․ The recorder’s intuitive design makes managing recordings straightforward, allowing users to organize files and transfer them to a computer with ease․ By regularly backing up your recordings, you can ensure they are safe and easily retrievable․ The device’s organizational features help users manage their recordings effectively, preventing clutter and making it easy to locate specific files․ Transferring recordings to a computer not only frees up space on the device but also provides a secure backup option․ Regular file backups are essential for maintaining your recordings and preventing accidental loss․ The Dododuck USB Charger Recorder provides a user-friendly experience for managing recordings, allowing users to organize, transfer, and backup files effortlessly․ The device’s compatibility with computers ensures seamless file transfers, making it easy to manage and store your recordings securely․ Regular backups are recommended to protect your recordings and ensure they remain accessible for future use․ The recorder’s organizational features enable users to manage their files efficiently, allowing for quick access to important recordings․ By transferring files to a computer and organizing them, users can maintain a clear and secure record of their recordings․ Regular backups are crucial for preventing data loss and ensuring your recordings are safe․ The Dododuck USB Charger Recorder simplifies the process of managing recordings, allowing users to transfer, organize, and backup files with ease․ The device’s intuitive design ensures that users can manage their recordings efficiently, preventing data loss and ensuring quick access to important files․ Regular backups are essential for maintaining your recordings and ensuring they remain accessible for future use․ The recorder’s compatibility with computers allows for seamless file transfers, making it easy to manage and store your recordings securely․ Regular backups ensure that your recordings are protected and easily retrievable, while the device’s organizational features help manage files intuitively․ The Dododuck USB Charger Recorder provides a comprehensive solution for managing recordings, allowing users to organize, transfer, and backup files effortlessly․ The device’s USB connectivity ensures easy transfers to your computer, where you can organize and store files securely․ Regular backups are crucial for preventing data loss and ensuring your recordings remain accessible․ The recorder’s intuitive design makes managing recordings straightforward, allowing users to organize files and transfer them to a computer with ease; By regularly backing up your recordings, you can ensure they are safe and easily retrievable․ The device’s organizational features help users manage their recordings effectively, preventing clutter and making it easy to locate specific files․ Transferring recordings to a computer not only frees up space on the device but also provides a secure backup option․ Regular file backups are essential for maintaining your recordings and preventing accidental loss․ The Dododuck USB Charger Recorder provides a user-friendly experience for managing recordings, allowing users to organize, transfer, and backup files effortlessly․ The device’s compatibility with computers ensures seamless file transfers, making it easy to manage and store your recordings securely․ Regular backups are recommended to protect your recordings and ensure they remain accessible for future use․ The recorder’s organizational features enable users to manage their files efficiently, allowing for quick access to important recordings․ By transferring files to a computer and organizing them, users can maintain a clear and secure record of their recordings․ Regular backups are crucial for preventing data loss and ensuring your recordings are safe․ The Dododuck USB Charger Recorder simplifies the process of managing recordings, allowing users to transfer, organize, and backup files with ease․ The device’s intuitive design ensures that users can manage their recordings efficiently, preventing data loss and ensuring quick access to important files․ Regular backups are essential for maintaining your recordings and ensuring they remain accessible for future use․ The recorder’s compatibility with computers allows for seamless file transfers, making it easy to manage and store your recordings securely․ Regular backups ensure that your recordings are protected and easily retrievable, while the device’s organizational features help manage files intuitively․ The Dododuck USB Charger Recorder provides a comprehensive solution for managing recordings, allowing users to organize, transfer, and backup files effortlessly․ The device’s USB connectivity ensures easy transfers to your computer, where you can organize and store files securely․ Regular backups are crucial for preventing data loss and ensuring your recordings remain accessible․ The recorder’s intuitive design makes managing recordings straightforward, allowing users to organize files and transfer them to a computer with ease․ By regularly backing up your recordings, you can ensure they are safe and easily retrievable․ The device’s organizational features help users manage their recordings effectively, preventing clutter and making it easy to locate specific files․ Transferring recordings to a computer not only frees up space on the device but also provides a secure backup option․ Regular file backups are essential for maintaining your recordings and preventing accidental loss․ The Dododuck USB Charger Recorder provides a user-friendly experience for managing recordings, allowing users to organize, transfer, and backup files effortlessly․ The device’s compatibility with computers ensures seamless file transfers, making it easy to manage and store your recordings securely․ Regular backups are recommended to protect your recordings and ensure they remain accessible for future use․ The recorder’s organizational features enable users to manage their files efficiently, allowing for quick access to important recordings․ By transferring files to a computer and organizing them, users can maintain a clear and secure record of their recordings․ Regular backups are crucial for preventing data loss and ensuring your recordings are safe․ The Dododuck USB Charger Recorder simplifies the process of managing recordings, allowing users to transfer, organize, and backup files with ease․ The device’s intuitive design ensures that users can manage their recordings efficiently, preventing data loss and ensuring quick access to important files․ Regular backups are essential for maintaining your recordings and ensuring they remain accessible for future use․ The recorder’s compatibility with computers allows for seamless file transfers, making it easy to manage and store your recordings securely․ Regular backups ensure that your recordings are protected and easily
Additional Resources

4․1 Transferring Files to a Computer
To transfer recordings from the Dododuck USB Charger Recorder to your computer, connect the device using the included USB cable․ The recorder will appear as a USB drive in your computer’s file explorer․ Open the device folder and locate your recordings, which are stored as audio files․ Select the desired files and drag them to your computer’s storage location․ Use the original USB cable to ensure proper connectivity and avoid recognition issues․ Once transferred, organize the files into folders for easy access․ Always eject the device safely after transferring to prevent data loss or corruption; This method ensures seamless file management and backup․