Welcome to the GE Electric Self-Cleaning Oven Manual. This guide provides essential instructions for operating and maintaining your oven. Learn about its features‚ safety tips‚ and proper cleaning methods to ensure efficient and eco-friendly cooking experiences. Discover how to maximize your oven’s performance while adhering to recommended maintenance routines for long-term durability.
Overview of GE Self-Cleaning Oven Features
GE self-cleaning ovens are designed with advanced features for convenience and efficiency. They include high-temperature cleaning cycles‚ reaching up to 800°F‚ to incinerate food residue. Some models offer steam cleaning for lighter messes. The ovens feature automatic door locking during cycles for safety. Energy efficiency and eco-friendly designs reduce power consumption. Touchscreen controls and preset options simplify operation. Porcelain enamel interiors make cleaning easier. Convection cooking capabilities enhance baking and roasting. These features ensure thorough cleaning‚ reduced manual effort‚ and optimal cooking performance‚ making GE self-cleaning ovens a practical choice for modern kitchens.
Importance of Following the Manual Instructions
Following the GE Electric Self-Cleaning Oven Manual is crucial for safe and effective operation. The manual provides detailed guidelines to prevent accidents‚ such as fires or damage to the oven. It outlines proper preparation steps‚ like removing racks and ensuring the area is clear of flammable materials. Adhering to instructions ensures the self-cleaning cycle runs efficiently‚ avoiding overheating or malfunction. Ignoring manual advice‚ like using abrasive cleaners‚ can harm the oven’s finish. The manual also highlights energy-saving tips and maintenance routines to prolong the oven’s lifespan. By following the manual‚ users can optimize performance‚ reduce risks‚ and maintain their oven in top condition for years. Always refer to the manual before attempting any cleaning or operation to ensure safety and efficiency.

Preparing Your GE Self-Cleaning Oven for Use
Steps to Clean the Exterior Before First Use
Cleaning the exterior of your GE self-cleaning oven before first use ensures a fresh start and maintains its appearance. Begin by wiping down all surfaces with a soft‚ damp cloth to remove any dirt‚ dust‚ or packaging residue. Avoid using abrasive cleaners or scrubbers‚ as they may scratch the finish. For tougher stains‚ mix a solution of mild soap and warm water‚ and gently scrub with a non-abrasive sponge. Dry the exterior thoroughly with a clean towel to prevent water spots. Additionally‚ remove any protective film or packaging materials from glass surfaces and handles. This step ensures your oven looks like new and is ready for operation. Regular exterior cleaning helps maintain hygiene and prevents grime buildup‚ keeping your oven in pristine condition for years to come.
Removing Oven Racks and Preparing the Interior
Before using your GE self-cleaning oven‚ remove the oven racks and place them in warm‚ soapy water to soak. This helps loosen any residue and makes cleaning easier. Once soaked‚ scrub the racks with a non-abrasive sponge or brush‚ then rinse and dry thoroughly. Reinstall the racks‚ ensuring they are securely positioned. Next‚ inspect the oven interior for any large food debris or spills. Use a soft brush or paper towels to wipe away loose particles. Avoid using harsh chemicals or abrasive cleaners on the interior‚ as they may damage the finish. Proper preparation ensures the self-cleaning cycle works effectively and prevents damage to the oven’s surfaces. This step is crucial for maintaining your oven’s performance and longevity.

Operating the Self-Cleaning Cycle
The self-cleaning cycle uses high heat to incinerate food residue. Set the cycle via the control panel‚ let the oven heat‚ and allow it to cool before cleaning. This process is automated‚ requiring no manual intervention during operation.
How to Start the Self-Cleaning Cycle
To initiate the self-cleaning cycle on your GE electric oven‚ begin by ensuring the oven is empty of racks‚ food‚ and utensils; Press the Self-Clean button on the control panel. Use the provided controls to set the desired cleaning time‚ typically between 2 to 4 hours‚ depending on the level of soil. Once set‚ the oven door will automatically latch to ensure safety during the high-temperature cycle. The oven will heat to approximately 800°F (427°C)‚ incinerating food residue. Avoid opening the door during this process. After the cycle completes‚ let the oven cool before wiping away ash with a damp cloth. Always adhere to the manual’s instructions to ensure optimal results and safety.
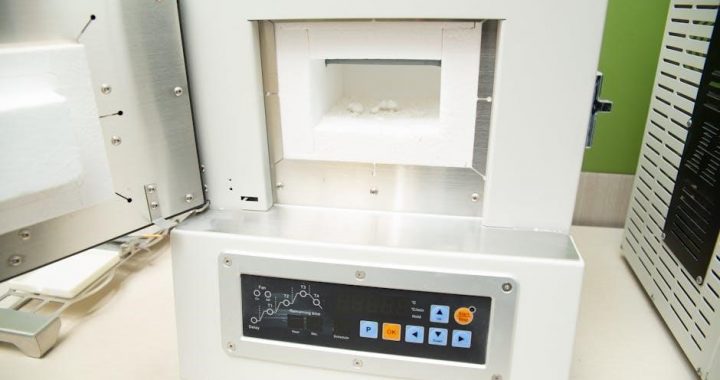
Understanding the High-Temperature Cleaning Process
The GE self-cleaning oven uses a high-temperature cleaning process to incinerate food residue and grime. During the cycle‚ the oven heats to approximately 800°F (427°C)‚ turning tough stains into ash. This method is efficient for removing stubborn spills and grease without manual scrubbing. The oven door locks automatically to ensure safety and prevent heat from escaping. The process typically takes 2 to 4 hours‚ depending on soil levels. After completion‚ allow the oven to cool before wiping away ash with a damp cloth. While this method is convenient‚ it can shorten the oven’s lifespan‚ so use it sparingly. Always follow manual guidelines to maintain your oven’s performance and longevity.

Post-Cleaning Maintenance and Safety
After the self-cleaning cycle‚ allow the oven to cool completely before wiping ash with a damp cloth. Avoid harsh chemicals and abrasive cleaners to protect the finish. Regularly inspect the oven door seal for damage to ensure proper function. Always follow safety guidelines to prevent hazards and maintain optimal performance.
How to Clean Up After the Self-Cleaning Cycle
After the self-cleaning cycle‚ allow the oven to cool completely. Once cool‚ open the door and wipe away ash and residue using a damp cloth. Avoid using harsh chemicals or abrasive cleaners‚ as they may damage the oven’s finish. For tough spots‚ mix baking soda and water to create a paste‚ apply it‚ and let it sit before wiping clean. Do not use metal scourers or rough sponges‚ as they can scratch the surfaces. If desired‚ use a mild soap solution to further clean visible areas‚ but rinse thoroughly to remove any residue. Regularly cleaning after the cycle ensures optimal performance and maintains the oven’s appearance. Always follow safety guidelines to avoid hazards during cleanup.
Safety Precautions to Avoid Damage or Hazards
Always prioritize safety when using your GE electric self-cleaning oven. Avoid running the self-cleaning cycle too frequently‚ as it can shorten the oven’s lifespan. Never use harsh chemicals or abrasive cleaners‚ as they may damage the porcelain finish. Ensure proper ventilation during the self-cleaning cycle to prevent fumes from spreading. Keep children and pets away from the oven during and after cleaning‚ as surfaces remain extremely hot. Avoid touching the oven door or interior until it has completely cooled. Never leave the oven unattended while in use. If an error occurs‚ turn off the oven and allow it to cool before addressing the issue. Always follow the manual’s instructions to prevent potential hazards and ensure safe operation.
Troubleshooting Common Issues
Address common issues like error codes‚ oven not turning off‚ or self-cleaning cycle malfunctions. Check the door latch‚ ensure proper power supply‚ and refer to the manual for specific error resolutions.
Resolving Errors During the Self-Cleaning Cycle
If an error code appears during the self-cleaning cycle‚ first ensure the oven door latch is secure. If the issue persists‚ switch off the circuit breaker and allow the oven to cool before restarting. Check for any blockages in the door or hinges. For specific error codes‚ consult the manual or contact GE support. Avoid using harsh chemicals or abrasive cleaners‚ as they can damage the porcelain finish. Regular maintenance and gentle cleaning can prevent errors and extend the oven’s lifespan. Always prioritize safety by keeping flammable materials away and following the manual’s instructions carefully.
Addressing Oven Door Latch Problems
If your GE self-cleaning oven’s door latch fails to lock automatically during the cycle‚ ensure the door is fully closed and properly aligned. Sometimes‚ manual activation may be required after initiating the self-cleaning process. Clean the latch area regularly to prevent debris buildup. If issues persist‚ refer to your manual or contact GE support for assistance. Always ensure the latch is secure before starting the cycle to avoid hazards. If the latch doesn’t lock‚ the self-cleaning cycle may not start or could malfunction. Keep flammable materials away and follow all safety guidelines provided in the manual. Proper latch function is crucial for safe and effective cleaning. Regular maintenance can prevent such issues from arising.