edger user guide

Edger User Guide: A Comprehensive Overview (Updated 03/31/2026)

Welcome! This comprehensive guide, updated today, March 31st, 2026, will expertly navigate you through installation, operation, and diligent maintenance of your new edger.

Edgers are specialized landscaping tools designed to create clean, defined lines between your lawn and other surfaces like sidewalks, driveways, flower beds, and patios. Unlike traditional lawnmowers that cut grass at a uniform height, edgers focus on vertically cutting along edges, providing a polished and professional appearance to your landscape. They are essential for maintaining curb appeal and a well-manicured yard.

Whether you’re a homeowner striving for a pristine lawn or a landscaping professional maintaining multiple properties, understanding the function and benefits of an edger is crucial. Modern edgers come in various forms, including gas-powered and electric models, each offering unique advantages to suit different needs and preferences. This guide will delve into these options, providing detailed insights into their features, operation, and maintenance, ensuring you achieve optimal results with your edging endeavors.

Types of Edgers Available

The edger market presents homeowners and professionals with two primary choices: gas-powered and electric models. Gas-powered edgers, typically fueled by gasoline, offer robust power and extended runtime, making them ideal for larger properties and demanding tasks; They are not limited by cords or battery life, providing greater freedom of movement.

Electric edgers, conversely, prioritize convenience and environmental friendliness. These can be corded, requiring access to a power outlet, or cordless, utilizing rechargeable batteries. Cordless electric edgers offer portability similar to gas models, though runtime is dependent on battery capacity. Choosing between these types hinges on factors like yard size, power requirements, and personal preference regarding noise levels and maintenance.

Gas-Powered Edgers: Features & Benefits

Gas-powered edgers excel in delivering consistent, high power, making them perfect for tackling tough edging jobs and expansive landscapes. A key benefit is their unrestricted runtime; you can continue edging as long as you have fuel, unlike battery-dependent alternatives. These edgers typically feature adjustable cutting depths, allowing customization for various edging styles and surface types.

Furthermore, gas edgers often boast durable construction, designed to withstand frequent use and challenging conditions. While requiring more maintenance – including oil changes and spark plug replacements – this also contributes to their longevity. The powerful engines effectively cut through overgrown grass and stubborn weeds, providing professional-quality results. They are a strong choice for users prioritizing power and endurance.

Electric Edgers: Features & Benefits

Electric edgers, both corded and cordless, offer a compelling blend of convenience and efficiency. Cordless models, powered by rechargeable batteries, provide excellent maneuverability without the restriction of a power cord, ideal for smaller to medium-sized yards. Corded electric edgers deliver consistent power, eliminating concerns about battery life during extended use.

A significant advantage of electric edgers is their reduced maintenance compared to gas-powered models; no oil changes or spark plug replacements are needed. They are also considerably quieter, making them neighbor-friendly. While generally less powerful than gas edgers, modern electric models offer sufficient power for most residential edging tasks. They represent an eco-conscious choice, producing zero emissions during operation.

Choosing the Right Edger for Your Needs

Selecting the ideal edger hinges on several key factors. Yard size is paramount: larger properties often benefit from the power and runtime of a gas-powered edger, while smaller yards may find an electric model sufficient. Consider the edging frequency; occasional use leans towards electric convenience, whereas frequent, demanding tasks justify gas power.

Corded versus cordless electric edgers present another decision. Cordless offers freedom, but battery life and charging time are considerations. Terrain also matters – uneven ground might necessitate a lighter, more maneuverable electric model. Finally, budget plays a role; electric edgers generally have a lower upfront cost, but gas models offer long-term durability.

Safety Precautions Before Operation

Prioritize safety before each use! Thoroughly inspect the work area, removing stones, debris, and any obstacles that could become projectiles. Ensure children and pets are a safe distance away – a minimum of 50 feet is recommended. Never operate the edger in wet or damp conditions to avoid electrical shock (electric models) or loss of control.

Fuel safety is crucial for gas-powered edgers; refuel only when the engine is cool and in a well-ventilated area. Be mindful of power cords with electric models, avoiding damage and ensuring they are clear of the cutting path. Always disconnect the power source when performing maintenance or adjustments. Familiarize yourself with the edger’s emergency stop mechanism.

Personal Protective Equipment (PPE)

Essential PPE is non-negotiable for safe edger operation. Always wear safety glasses or a face shield to protect your eyes from flying debris. Sturdy, closed-toe shoes are vital, preferably steel-toed, to guard against accidental contact with the blade or ejected objects. Hearing protection, such as earplugs or earmuffs, is highly recommended due to the edger’s engine noise.

Long pants and a long-sleeved shirt offer additional protection from potential abrasions and projectiles. Gloves provide a better grip and shield your hands. Avoid loose clothing that could get caught in the machinery. Regularly inspect your PPE for damage and replace items as needed to maintain optimal safety during each edging session.

Pre-Operation Checklist

Before each use, a thorough pre-operation check is crucial for safety and optimal performance. First, inspect the edger for any loose parts, damaged cords (for electric models), or fuel leaks (for gas models). Ensure the blade is securely attached and in good condition – dull or damaged blades are a hazard.

Clear the work area of stones, debris, and any objects that could become projectiles. Verify the safety shield is properly installed and functioning. For gas edgers, check the oil and fuel levels, and for electric edgers, confirm the power cord is undamaged and the connection is secure. Finally, confirm you’ve donned all required Personal Protective Equipment (PPE) before starting the edger.

Assembling Your Edger

Careful assembly is vital for safe and effective operation. Begin by unpacking all components and verifying against the parts list in your owner’s manual. Typically, assembly involves attaching the handle to the edger body using provided bolts and washers – ensure these are tightened securely, but avoid over-tightening;

Next, attach the wheel assembly, if applicable, following the diagram in the manual. Some models require attaching a blade guard or deflector shield; confirm proper alignment and secure fastening. Before proceeding, double-check all connections. A loosely assembled edger can be dangerous and lead to malfunctions. Refer to your specific model’s instructions for detailed guidance, as assembly steps can vary.
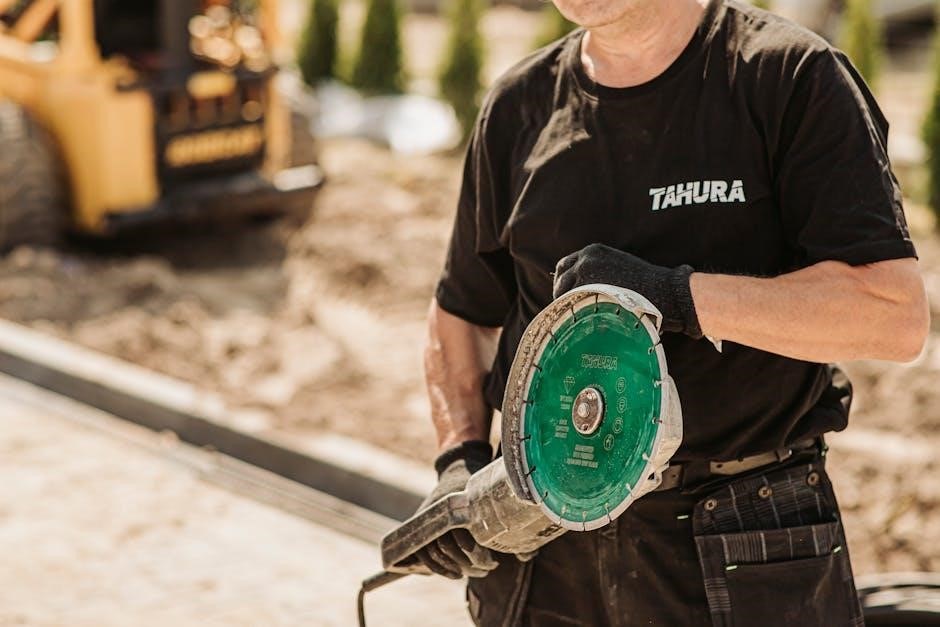
Attaching the Blade

Blade attachment is a critical step demanding utmost care. Always disconnect the spark plug wire (gas edgers) or remove the battery (electric edgers) before handling the blade. Consult your owner’s manual for the correct blade orientation – installing it backward will compromise performance and safety.

Secure the blade using the provided hardware, typically a nut and washer. Tighten the nut to the manufacturer’s specified torque; insufficient tightness risks blade detachment during operation, while over-tightening can damage the shaft. After tightening, visually inspect the blade to confirm it’s firmly attached and rotates freely. Never operate the edger with a damaged or improperly installed blade.

Adjusting Cutting Depth

Precise depth control is key to achieving professional edging results and preventing scalping. Most edgers feature a depth adjustment lever or wheel, allowing you to raise or lower the blade. Begin with a shallow setting, especially on uneven terrain, to avoid digging too deeply.

Gradually increase the cutting depth until you achieve the desired groove width. Observe the edger’s performance as you adjust; if it struggles or leaves an uneven cut, reduce the depth. Remember that different turf types and soil conditions may require varying depth settings. Regularly check and readjust the depth, as it can shift during operation due to vibrations and ground conditions.

Operating Your Edger: Step-by-Step Guide

Before starting, ensure the area is clear of debris and obstructions. For gas-powered models, follow the starting procedure outlined in the manual – typically involving priming the bulb and engaging the choke. Electric edgers require a properly connected extension cord.

Begin edging with a smooth, controlled motion, overlapping each pass slightly for a clean, consistent groove. Maintain a consistent walking speed and guide the edger along the desired line. Avoid forcing the edger; let the blade do the work. Regularly clear away clippings to maintain visibility and prevent clogging. Always edge away from yourself and others for safety.

Starting a Gas-Powered Edger

Prior to starting, verify the fuel tank is filled with the correct fuel mixture and the spark plug is securely connected. Engage the blade safety lock, if equipped. Prime the fuel bulb several times – typically 5-10 pumps – until fuel is visible. Slowly engage the choke lever, positioning it for a cold start.

Grip the starter handle firmly and pull briskly. Repeat this motion until the engine attempts to start. Once it sputters, gradually disengage the choke. Continue pulling until the engine runs smoothly. Allow the engine to warm up briefly before engaging the blade. Always maintain a firm grip and stable footing during the starting process.

Starting an Electric Edger

Before operation, ensure the edger is connected to a properly grounded, compatible power outlet. Verify the power switch is in the “off” position. Inspect the power cord for any damage – do not use if frayed or damaged. Depress the safety lock button, if present, and simultaneously squeeze the trigger to initiate the motor.

Release the trigger immediately if the blade doesn’t engage. A brief pause may be required between attempts to prevent overloading the motor. Always maintain a secure grip on the handles during startup. Electric edgers start instantly, so be prepared for immediate blade rotation. Disconnect from power when not in use.

Edging Techniques for Clean Results

For a professional finish, walk at a steady pace, guiding the edger along the desired line. Overlap each pass slightly to avoid leaving ridges or uncut grass. Maintain a consistent cutting depth, adjusting as needed for varying turf conditions. Avoid forcing the edger; let the blade do the work.

Angle the edger slightly towards the lawn for a cleaner, more defined edge; Regularly clear away grass clippings to maintain visibility and prevent clogging. For tougher areas, make multiple shallow passes rather than one deep cut. Practice on an inconspicuous area first to get a feel for the edger’s performance. Remember safety first, and always wear appropriate PPE!

Maintenance & Care

Regular maintenance is crucial for extending the life and performance of your edger. After each use, thoroughly clean the housing and blade, removing any accumulated grass clippings or debris. Inspect the blade for damage – nicks, dullness, or bends – and address them promptly.

For gas-powered edgers, check the oil level and air filter regularly, following the manufacturer’s recommendations. Electric edgers require inspection of the power cord for frays or damage. Store your edger in a dry, protected environment. Proper care ensures optimal cutting and prevents premature wear, saving you time and money in the long run.

Blade Sharpening & Replacement

A sharp blade is essential for clean, precise edging. Regularly inspect your blade for dullness; a dull blade tears grass instead of cutting it cleanly. Sharpening can often be done with a metal file, following the original bevel angle. Always disconnect the power source (or remove the spark plug for gas models) before sharpening.

When the blade is severely damaged, worn, or cannot be adequately sharpened, it must be replaced. Consult your edger’s manual for the correct blade replacement part number. Ensure the new blade is securely attached, following the assembly instructions precisely. Improperly installed blades are dangerous and can cause injury. Prioritize safety during this process!

Engine Maintenance (Gas Edgers)

Maintaining your gas edger’s engine is crucial for reliable performance and longevity. Regularly check the oil level before each use, adding oil as needed according to the manufacturer’s specifications. Use the recommended oil type to avoid engine damage. Inspect the air filter frequently, cleaning or replacing it when dirty to ensure proper airflow;

Spark plugs should be inspected and replaced annually, or more often if experiencing starting difficulties. Fuel stabilization is vital, especially during storage; use a fuel stabilizer to prevent fuel degradation and carburetor issues. Properly dispose of old fuel. Adhering to a consistent maintenance schedule will significantly extend the life of your gas-powered edger.

Electric Edger Maintenance

Maintaining your electric edger is generally simpler than gas models, but still requires attention. Regularly inspect the power cord for any damage – cuts, fraying, or exposed wires – and replace it immediately if found to prevent electrical shock. Clean the motor housing after each use, removing grass clippings and debris with a dry cloth.

Check the blade for sharpness and secure attachment. Lubricate moving parts periodically with a silicone-based lubricant. Store the edger in a dry location to prevent corrosion. Avoid exposing the motor to excessive moisture. Proper care ensures your electric edger remains a reliable tool for years, delivering consistent performance with minimal fuss.

Troubleshooting Common Issues

Encountering problems? This section addresses frequent issues. If your edger won’t start, first verify the power source (outlet or fuel tank). Check the safety switch and ensure it’s engaged correctly. For uneven edging, adjust the cutting depth and maintain a consistent walking speed. Inspect the blade for dullness or damage; a sharp, properly installed blade is crucial.

Blade problems, like wobbling or failing to spin, often indicate a loose attachment or a damaged blade. Always disconnect the power source before inspecting the blade. If issues persist, consult a qualified technician. Remember safety first – never attempt repairs while the edger is powered or connected!

Edger Won’t Start

Frustrated with a non-starting edger? Let’s diagnose the issue. For gas-powered edgers, check the fuel level, ensuring fresh fuel is used. Verify the spark plug is clean and properly connected. Examine the air filter for obstructions. For electric edgers, confirm a functioning power outlet and a secure connection. Inspect the power cord for damage.

Also, ensure the safety switch is correctly engaged – it’s a common culprit! If the engine turns over but doesn’t fire, a carburetor issue might exist. If it’s completely unresponsive, a faulty starter motor or a blown fuse could be the cause. Always disconnect power before inspecting any components.

Uneven Edging

Achieving consistently clean edges requires technique and a properly maintained edger. If you’re experiencing uneven edging, first check the blade’s sharpness – a dull blade tears rather than cuts, resulting in a ragged appearance. Ensure the cutting depth is appropriately adjusted for the surface you’re edging; too shallow won’t cut effectively, too deep can cause scalping.

Maintain a consistent walking speed and guide the edger in a straight line. Overlapping passes slightly can help blend any inconsistencies. Also, consider the terrain; uneven ground will naturally lead to uneven cuts. Regularly clear debris from the edging path to prevent interference. Finally, verify the blade is securely attached and not wobbling.

Blade Problems

Encountering blade issues can significantly impact edging performance. A wobbling blade indicates a loose attachment; immediately stop the edger and tighten all securing bolts. If the blade is bent or damaged, it must be replaced – do not attempt to repair it. Dull blades cause tearing instead of clean cuts, necessitating sharpening or replacement.

Inspect the blade regularly for cracks, chips, or excessive wear. Ensure the blade is correctly installed with the cutting edge facing the appropriate direction. When replacing a blade, always use a manufacturer-approved replacement part. Improper blade installation can be dangerous and damage the edger. Always disconnect the power source before inspecting or working on the blade.

dmh 1500nex manual

Welcome! This manual guides you through the Pioneer DMH-1500NEX, a modern receiver boasting Android Auto and CarPlay․ It’s essential for new drivers seeking seamless smartphone integration․

Overview of the DMH-1500NEX Unit

The Pioneer DMH-1500NEX is a 6․8-inch Double DIN in-dash receiver designed to bring a modern driving experience to your vehicle․ It’s a versatile unit, prioritizing smartphone connectivity with both Android Auto and Apple CarPlay, offering a safer and more convenient way to access navigation, music, and communication features while on the road;

This receiver doesn’t feature a built-in CD/DVD player, focusing instead on digital media sources․ It supports various audio formats, ensuring compatibility with a wide range of music libraries․ The large touchscreen display provides clear visibility and intuitive control, enhancing the overall user experience․

Notably, the DMH-1500NEX is designed for vehicles that require a traditional wiring harness, making it a popular upgrade option․ Its emphasis on smartphone integration reflects the growing demand for these features in modern vehicles, as many potential customers now prioritize these capabilities when purchasing a new car․

Key Features and Benefits

The Pioneer DMH-1500NEX shines with its seamless smartphone integration, offering both Android Auto and Apple CarPlay for effortless access to your favorite apps and features; This allows for voice-controlled navigation, music streaming, and hands-free calling, promoting safer driving habits․

Beyond connectivity, the unit boasts a responsive 6․8-inch touchscreen display, providing a clear and intuitive interface․ It supports various audio formats, ensuring compatibility with diverse music libraries․ While lacking a built-in CD player, it excels in modern media playback․

Furthermore, the DMH-1500NEX offers customizable audio settings, allowing you to tailor the sound to your preferences․ Its design caters to vehicles needing a traditional wiring harness, making it a versatile upgrade․ Ultimately, it delivers a modern, connected, and enjoyable in-car entertainment experience, meeting the demands of today’s drivers․

Installation Guide

Begin your upgrade! This section details the DMH-1500NEX installation process, covering wiring, power connections, and speaker configurations for a smooth, successful setup․

Wiring Diagram Essentials

Understanding the Connections: The DMH-1500NEX wiring harness is crucial for proper functionality․ Begin by carefully reviewing the provided diagram, noting each wire’s designated purpose․ Key connections include the 12V constant power (yellow), 12V switched power (red), ground (black), and illumination (orange)․

Speaker Wiring: Speaker outputs are color-coded – white for front left, white/black for front right, blue for rear left, and blue/black for rear right․ Ensure correct polarity to maintain optimal sound quality․ Subwoofer connections, if applicable, will typically be RCA outputs․

Antenna & Other Connections: Don’t forget the antenna connection for radio reception․ Also, locate the steering wheel control adapter interface (if using) and connect it according to the diagram․ Incorrect wiring can lead to malfunctions, so double-check all connections before proceeding․ A multimeter can be helpful for verifying continuity and voltage․

Safety First: Always disconnect the vehicle’s negative battery terminal before beginning any wiring work to prevent short circuits and potential damage․

Connecting to Vehicle Power & Ground

Powering Up: Begin by locating a suitable 12V constant power source (typically yellow) and a 12V switched power source (usually red) in your vehicle’s wiring harness․ The constant power maintains memory functions, while the switched power activates the unit with the ignition․

Grounding is Key: A solid ground connection (black wire) is vital for stable operation and noise reduction․ Connect this wire to a clean, unpainted metal chassis point as close to the unit as possible․ Ensure a secure and corrosion-free connection․

Fuse Protection: Always use a fuse of the appropriate amperage on the power wires to protect the unit and your vehicle’s electrical system․ Refer to the DMH-1500NEX manual for the correct fuse rating․

Double-Check Polarity: Verify that the power and ground connections are correct before reconnecting the vehicle’s battery․ Incorrect polarity can cause severe damage to the unit․

Speaker Connections & Configuration

Wiring Harness: Utilize the provided wiring harness to connect your speakers to the DMH-1500NEX․ Match the speaker wire colors carefully – typically, white is left front, white/black is left rear, gray is right front, and gray/black is right rear․

Speaker Impedance: Ensure your speakers’ impedance (measured in ohms) is compatible with the head unit․ The DMH-1500NEX generally supports 4-ohm speakers․ Using incorrect impedance can damage the amplifier․

Configuration Settings: Access the audio settings menu on the DMH-1500NEX to configure your speaker setup․ Options include selecting the number of speakers, assigning speaker outputs, and setting the crossover frequencies․

Balance & Fader: Fine-tune the soundstage using the balance and fader controls to adjust the volume levels for each speaker․ Proper configuration enhances the listening experience․

Smartphone Integration

Seamless Connectivity: The DMH-1500NEX excels with Android Auto and Apple CarPlay, offering drivers essential smartphone features directly on the receiver’s display․

Android Auto Setup & Troubleshooting

Initial Setup: To begin, ensure your Android smartphone meets the compatibility requirements outlined on the Pioneer website․ Download the Android Auto app from the Google Play Store․ Connect your phone to the DMH-1500NEX using a high-quality USB cable – a direct connection is crucial for stable performance․

Connection Process: Upon connection, the receiver will prompt you to accept Android Auto’s terms of service and grant necessary permissions․ Follow the on-screen instructions carefully․ If Android Auto doesn’t launch automatically, select the “Android Auto” icon on the receiver’s home screen․

Troubleshooting: If you encounter connection issues, first verify the USB cable․ Try a different cable known to work with data transfer․ Ensure Android Auto is enabled on your smartphone’s settings․ Restart both your phone and the receiver․ If problems persist, check for software updates for both the DMH-1500NEX and the Android Auto app․ A factory reset of the receiver (as a last resort) may resolve stubborn issues․ Consult Pioneer’s support website for detailed troubleshooting guides and FAQs․

Apple CarPlay Setup & Troubleshooting

Initial Connection: Begin by confirming your iPhone is compatible with Apple CarPlay – generally, iPhone 5 and newer models are supported․ Utilize a genuine Apple Lightning to USB cable for a reliable connection to the DMH-1500NEX․ Avoid using third-party cables, as they can often cause connectivity problems․

Pairing Process: When connecting your iPhone for the first time, a prompt will appear on the receiver asking if you want to allow CarPlay access․ Confirm this request․ Siri will then become available through the receiver’s interface․ Ensure “Allow CarPlay” is enabled in your iPhone’s settings under General > CarPlay․

Troubleshooting: If CarPlay fails to connect, verify the USB cable and try a different one․ Restart both your iPhone and the DMH-1500NEX․ Check for iOS updates on your iPhone and firmware updates for the receiver․ If issues continue, try resetting CarPlay settings on your iPhone (Settings > General > CarPlay > Reset CarPlay)․ Pioneer’s support website offers extensive troubleshooting resources and FAQs for common CarPlay issues․

Wireless Connectivity Options

Bluetooth Pairing: The DMH-1500NEX offers robust Bluetooth connectivity for hands-free calling and audio streaming․ To pair a device, navigate to the Bluetooth settings on the receiver and select “Add Device․” Ensure your smartphone’s Bluetooth is enabled and discoverable․

Wireless Audio Streaming: Once paired, you can stream music from your smartphone using Bluetooth․ The receiver supports various Bluetooth profiles for optimal audio quality․ For improved streaming stability, minimize the distance between the receiver and your smartphone․

Wi-Fi Capabilities: While primarily utilizing smartphone mirroring via USB, the DMH-1500NEX also supports Wi-Fi for software updates and potentially certain app functionalities․ Connect to a 2․4GHz Wi-Fi network through the receiver’s settings menu․ Note that Wi-Fi performance depends on network signal strength․ Regularly check for firmware updates to ensure optimal performance and compatibility with new features․

System Settings & Customization

Personalize your experience! Explore audio, display, and navigation settings to tailor the DMH-1500NEX to your preferences for optimal driving enjoyment․

Audio Settings & Equalization

Fine-tune your sound! The DMH-1500NEX offers extensive audio customization options․ Access these settings through the main menu, navigating to ‘Audio Settings’․ Here, you’ll find controls for volume leveling, balance, and fader – allowing precise adjustment of sound distribution within the vehicle cabin․

Equalizer Control: Dive deeper with the built-in 13-band graphic equalizer․ This powerful tool lets you sculpt the audio frequencies to match your musical taste or compensate for vehicle acoustics․ Preset equalizer curves (Rock, Pop, Jazz, etc․) are available for quick adjustments, or create and save your own custom profiles․

Advanced Sound Features: Explore features like Bass Boost, Loudness, and Subwoofer Level control to enhance low-frequency response and overall sound clarity․ The DMH-1500NEX also supports advanced sound processing technologies for a truly immersive listening experience․ Experiment with these settings to achieve the perfect sonic balance for your driving enjoyment․ Remember to adjust gradually for optimal results!

Display Settings & Brightness

Personalize your view! The DMH-1500NEX provides comprehensive display customization options, accessible via the ‘Display Settings’ menu․ Adjust brightness levels to suit varying lighting conditions – from bright sunlight to nighttime driving․ Choose between a range of preset brightness modes or manually fine-tune the intensity for optimal visibility․

Display Customization: Beyond brightness, you can modify the display color, contrast, and even select different themes to match your vehicle’s interior․ Adjust the screen timeout duration to conserve power when the unit is inactive․ Customize the wallpaper with personal images or select from pre-loaded options․

Advanced Display Options: Explore features like demo mode for showcasing the unit’s capabilities and adjust the display’s responsiveness to touch input․ Ensure optimal viewing angles by calibrating the display settings․ Regularly adjusting these settings will enhance your overall user experience and ensure clear visibility while driving safely․

Navigation System Configuration

Get Directions with Ease! The DMH-1500NEX’s navigation system requires initial configuration for optimal performance․ Access the ‘Navigation Settings’ menu to begin․ First, ensure your map data is up-to-date; connect to Wi-Fi to download the latest maps and points of interest (POI)․ Configure your preferred route calculation method – fastest time, shortest distance, or avoiding tolls․

Personalized Navigation: Customize voice guidance settings, selecting your preferred language and volume․ Adjust map display options, including 2D or 3D view, traffic display, and lane guidance․ Set up your home and work addresses for quick navigation․ Explore advanced features like speed limit warnings and real-time traffic updates․

System Optimization: Regularly clear the navigation system’s cache to improve performance․ Configure the system to automatically reroute in case of traffic congestion․ Familiarize yourself with the search function for efficient destination input․ Proper configuration ensures a smooth and reliable navigation experience․

Troubleshooting Common Issues

Resolve Problems Quickly! This section addresses frequent DMH-1500NEX issues, including Bluetooth connectivity and display malfunctions, offering solutions for a seamless user experience․

Bluetooth Connection Problems

Experiencing Bluetooth difficulties? Several factors can disrupt the connection between your smartphone and the DMH-1500NEX․ First, ensure Bluetooth is enabled on both devices and that they are within range of each other – typically within 30 feet․

Pairing Issues: If your device isn’t pairing, try deleting any existing DMH-1500NEX entries from your phone’s Bluetooth settings․ Then, initiate the pairing process again from the receiver’s Bluetooth menu․ Confirm any prompted PIN codes match on both devices․

Interference: Other wireless devices can sometimes interfere with Bluetooth signals․ Try moving away from potential sources of interference, such as Wi-Fi routers or microwave ovens․

Device Compatibility: While the DMH-1500NEX supports a wide range of Bluetooth profiles, older or less common devices might experience compatibility issues․ Check Pioneer’s website for a list of tested and compatible devices․ A receiver reset can also resolve intermittent connection drops․

Firmware Updates: Ensure your DMH-1500NEX has the latest firmware installed․ Updates often include Bluetooth performance improvements and bug fixes․

Display & Touchscreen Issues

Facing display or touchscreen problems with your DMH-1500NEX? Several solutions can address common issues․ First, verify the display brightness is appropriately adjusted via the settings menu; a dim screen can sometimes appear non-functional․

Touchscreen Responsiveness: If the touchscreen is unresponsive, try a soft reset of the unit by briefly pressing and releasing the power button․ For persistent issues, a full factory reset (accessible through the settings menu – caution: this will erase saved settings) might be necessary․

Display Flickering or Distortion: Check all wiring connections to the display․ Loose or damaged cables can cause visual artifacts․ Ensure the vehicle’s voltage is stable, as fluctuations can affect display performance․

Frozen Screen: If the screen freezes, attempt a hard reset by disconnecting the vehicle’s battery for several minutes, then reconnecting it; This forces a complete system reboot․

Firmware Updates: Outdated firmware can sometimes cause display glitches․ Regularly check for and install the latest firmware updates from Pioneer’s support website․

prayer for lusting to stop pdf

Understanding Lust and Its Spiritual Impact

Moral failures are deeply painful‚ prompting a need for careful consideration regarding sexual temptation and seeking support through prayers of others.

Lust‚ a destructive force‚ impacts spirituality‚ demanding a focused approach to overcome it‚ utilizing resources like a prayer for overcoming lust in PDF format.

Confession and a renewed mind‚ as highlighted in Romans 12:2‚ are crucial elements in battling lust‚ alongside seeking guidance from spiritual leaders.

The Nature of Lustful Thoughts

Lustful thoughts aren’t simply fleeting temptations; they represent a deeper struggle‚ a captivating force that can quickly escalate if left unchecked. These thoughts often begin subtly‚ perhaps a momentary glance or an unintentional exposure‚ but they possess a remarkable ability to take root and flourish in the imagination.

They are characterized by an obsessive focus on sexual gratification‚ detaching the individual from genuine connection and reducing others to objects of desire. This internal landscape‚ fueled by the “lust of the eyes” and the “lust of the flesh‚” creates a distorted reality‚ prioritizing immediate gratification over long-term spiritual well-being.

Recognizing the insidious nature of these thoughts is the first step toward freedom. It’s vital to understand that dwelling on them isn’t harmless fantasy; it’s a pathway to sin‚ a breeding ground for destructive behaviors. Resources like a prayer for overcoming lust‚ often available as a PDF‚ can provide a structured approach to confronting and dismantling these thought patterns‚ offering scriptural declarations and guidance for a renewed mind.

Biblical Perspectives on Lust

The Bible consistently condemns lust‚ portraying it not merely as an action‚ but as a heart issue. Jesus‚ in Matthew 5:28‚ equates looking at someone with lustful intent to committing adultery in the heart‚ highlighting the gravity of even unspoken desires.

Romans 1:24-27 details the consequences of yielding to lust‚ describing a descent into dishonorable passions and a rejection of God’s natural order. 1 John 2:16 warns against the “lust of the flesh‚ the lust of the eyes‚ and the pride of life‚” identifying the core temptations that lead us astray.

However‚ the Bible also offers hope and a path to freedom. Romans 6 speaks of dying to sin and living in newness of life through Christ. Utilizing resources like a dedicated prayer for overcoming lust – often found as a downloadable PDF – allows believers to align their desires with God’s will‚ seeking His strength to resist temptation and walk in sexual purity (Romans 1:4).

The Consequences of Unchecked Lust

Unchecked lust carries devastating consequences‚ extending far beyond momentary gratification. It erodes spiritual connection with God‚ creating distance and hindering intimacy with Him. A moral failure‚ as experienced by a fellow pastor seeking counsel‚ demonstrates the profound pain and damage it inflicts.

Lust distorts perception‚ objectifying others and diminishing their inherent worth. It fuels addictive behaviors‚ leading to secrecy‚ shame‚ and broken relationships. The “mighty throng destroyed” by this sin‚ as noted‚ underscores its widespread and destructive power.

Seeking deliverance through consistent prayer‚ potentially utilizing a focused prayer for lusting to stop available as a PDF resource‚ is vital. Ignoring the issue allows it to fester‚ creating a cycle of sin and despair. Boldly approaching the throne of grace (Hebrews 4:16) offers access to the healing and strength needed to break free from its grip and embrace true freedom.

Prayer as a Weapon Against Lust

Prayer is a powerful tool‚ offering access to divine strength to overcome temptation; a dedicated prayer for lusting to stop‚ often found in PDFs‚ aids this fight.

Confession unlocks freedom‚ while scriptural declarations reinforce faith‚ enabling a renewed mind and bolstering resistance against harmful desires.

Consistent‚ confident prayer is essential for lasting victory‚ aligning with God’s grace and fostering spiritual purity.

The Power of Confession in Prayer

Confession before God is a foundational step in dismantling the stronghold of lust. It’s acknowledging our vulnerability and seeking His forgiveness‚ recognizing our inability to overcome this battle independently. A prayer for lusting to stop‚ often available as a PDF resource‚ frequently begins with heartfelt confession.

This isn’t merely reciting sins‚ but a genuine turning away from those desires‚ a sincere plea for cleansing. James 5:16 reminds us that the prayer of a righteous person has great power. When we confess‚ we open ourselves to that power‚ allowing God to work within us.

The act of voicing our struggles breaks the chains of secrecy and shame that lust thrives upon. It’s a courageous act of humility‚ acknowledging our need for divine intervention. Furthermore‚ confession prepares the heart to receive the grace and strength needed to resist future temptations‚ paving the way for lasting freedom and spiritual growth.

Remember‚ boldly approaching the throne of grace (Hebrews 4:16) is key.

Specific Scriptural Declarations for Freedom

Employing scriptural declarations is a powerful component of prayer for lusting to stop‚ often found within comprehensive PDF guides. These aren’t simply positive affirmations‚ but proclamations rooted in God’s truth‚ actively rebuking the power of sin. Declare‚ “I receive the spirit of holiness in my life to walk in sexual purity in the name of Jesus (Romans 1:4).”

Further‚ boldly state‚ “I loose myself from the spirit of the world‚ the lust of the flesh‚ the lust of the eyes‚ and the pride of life.” Affirming 1 John 2:16‚ declare‚ “I overcome the world through the power of the Holy Spirit!”

These declarations dismantle the lies lust whispers‚ replacing them with the unwavering truth of God’s Word. Consistent‚ intentional declaration reinforces your commitment to purity and activates God’s protective power. Remember‚ declaring God’s promises aligns your will with His‚ unleashing His freedom-bringing power in your life.

Utilize these verses as a foundation for your personal prayer time.

Praying for a Renewed Mind (Romans 12:2)

Romans 12:2 calls for a transformation of the mind – a crucial element in any effective prayer for lusting to stop‚ often detailed in PDF resources on spiritual warfare. This isn’t a passive request‚ but an active pursuit of aligning your thoughts with God’s. Pray specifically for the dismantling of thought patterns that fuel temptation.

Ask for God to replace those thoughts with truth‚ righteousness‚ and purity. Visualize your mind being cleansed and renewed‚ becoming a sanctuary for holy thoughts. Declare that you will no longer dwell on images or fantasies that dishonor God or harm your spirit.

This renewal requires consistent effort and intentionality. Combine this prayer with actively choosing to focus on uplifting and edifying content. Seek God’s guidance in identifying and rejecting ungodly influences. A renewed mind is a powerful weapon against the insidious nature of lust.

Practical Strategies Combined with Prayer

Prayer‚ alongside identifying triggers and seeking accountability‚ is vital; escaping temptation—like Joseph—and utilizing a PDF guide strengthens resolve.

Physical escape‚ such as a walk or connecting with loved ones‚ complements prayer‚ fostering a virtuous cycle of resistance and spiritual growth.

Identifying Triggers and Avoiding Temptation

Recognizing personal triggers is paramount in combating lustful thoughts. These can range from specific images or situations to emotional states like loneliness or stress. A proactive approach involves consciously identifying these vulnerabilities and implementing strategies to minimize exposure.

Avoiding temptation isn’t about suppressing desires entirely‚ but rather strategically removing oneself from environments or circumstances that readily ignite them. This might mean limiting social media use‚ carefully curating online content‚ or establishing boundaries in relationships.

Utilizing resources like a prayer for lusting to stop PDF can provide structured guidance during these moments of vulnerability. Supplementing this with practical steps—like a change of scenery or engaging in a healthy distraction—reinforces the commitment to purity. Remember Joseph’s example: immediate‚ decisive action—running—is often the most effective response.

Furthermore‚ proactively filling your mind with positive and uplifting content—scripture‚ inspiring books‚ or meaningful conversations—can displace harmful thoughts and strengthen your spiritual defenses.

The Importance of Accountability

Accountability is a cornerstone of overcoming lust‚ providing a vital support system and deterrent against secrecy. Sharing struggles with a trusted friend‚ mentor‚ or spiritual leader creates a safe space for honesty and encouragement.

This isn’t about seeking judgment‚ but rather inviting someone to walk alongside you in your journey towards purity. A committed accountability partner can offer prayer support‚ challenge unhealthy patterns‚ and celebrate victories.

Utilizing resources like a prayer for lusting to stop PDF can be enhanced by sharing your progress and challenges with your accountability partner. Discussing the prayers‚ the struggles‚ and the breakthroughs fosters deeper understanding and mutual support.

The community aspect‚ as highlighted in available resources‚ is crucial. Knowing someone is aware of your battles and praying for you provides strength and reduces the likelihood of succumbing to temptation. It’s a powerful demonstration of shared faith and commitment.

Physical Escape as a Response to Temptation (Following Joseph’s Example)

Joseph’s story in Genesis 39 offers a powerful illustration of proactive escape as a defense against temptation. He didn’t engage in debate or rationalization; he ran. This immediate‚ decisive action is a model for us today when confronted with lustful thoughts or situations.

When temptation arises‚ don’t pause to analyze or justify. Instead‚ physically remove yourself from the triggering environment. Go for a walk‚ spend time in nature‚ connect with family‚ or engage in a healthy activity. A literal run can also be incredibly effective.

Combining this physical escape with fervent prayer – utilizing resources like a prayer for lusting to stop PDF – amplifies its effectiveness. Ask for strength to resist‚ clarity of mind‚ and the courage to flee.

Remember‚ escape isn’t weakness; it’s wisdom. It’s a proactive step to protect your heart and mind‚ demonstrating a commitment to purity and honoring God. It’s a tangible expression of faith in action.

Elements of a Powerful Prayer for Overcoming Lust

Boldly approach God’s throne for grace (Hebrews 4:16)‚ seeking freedom from destructive spirits and sexual impurity‚ utilizing a prayer for lusting to stop PDF.

Confidently receive the spirit of holiness (Romans 1:4)‚ releasing yourself from worldly desires and overcoming through the Holy Spirit’s power.

Prayers for Sexual Purity (Romans 1:4)

Prayers focused on sexual purity‚ rooted in Romans 1:4‚ are vital weapons against the pervasive influence of lust. A dedicated prayer‚ often found as a PDF resource‚ can be a powerful tool in this spiritual battle. These petitions aren’t merely words; they are declarations of dependence on God’s grace and a commitment to holiness.

Specifically‚ invoke the spirit of holiness into your life‚ actively requesting the strength to walk in sexual purity‚ mirroring the apostle Paul’s desire. Declare freedom from the “lust of the flesh‚ the lust of the eyes‚ and the pride of life‚” recognizing these as avenues for temptation.

Utilize scriptural declarations‚ affirming your ability to overcome the world through the Holy Spirit (1 John 2:16). Remember‚ consistent‚ heartfelt prayer‚ coupled with a genuine desire for change‚ unlocks God’s power to transform your thoughts and desires‚ leading to lasting freedom. Downloadable PDF guides can provide structured prayers for consistent use.

Releasing Yourself from Destructive Spirits

Recognizing that lust isn’t solely a fleshly struggle‚ but can involve spiritual warfare‚ necessitates prayers for release from destructive spirits. Many PDF resources dedicated to overcoming lust emphasize this dimension‚ offering specific petitions for freedom. These prayers aren’t about magical formulas‚ but about asserting God’s authority over darkness.

Specifically‚ declare your detachment from “the spirit of the world‚” acknowledging its influence on impure thoughts and desires. Bind and rebuke any demonic strongholds fueling temptation‚ claiming the victory already won by Christ on the cross.

Invoke the power of the Holy Spirit to cleanse your mind and heart‚ replacing lustful thoughts with truth and purity. Consistent‚ assertive prayer‚ often found in downloadable PDF guides‚ weakens the enemy’s grip and opens the door to genuine healing and freedom. Remember to pray with boldness and unwavering faith.

Boldly Approaching the Throne of Grace (Hebrews 4:16)

Hebrews 4:16 assures us of access to God’s grace and mercy in our time of need – a vital truth when battling lust. Many prayer guides‚ available as PDF downloads‚ emphasize this principle‚ encouraging unwavering confidence in approaching God. Shame and guilt often accompany struggles with lust‚ hindering our willingness to seek help.

However‚ this verse reminds us that God wants to help; Don’t hesitate to pour out your heart‚ confessing your weaknesses and asking for strength. Recognize that seeking help isn’t a sign of failure‚ but of faith.

Utilize prayers specifically designed for overcoming lust‚ often found in these PDF resources‚ as a starting point. Combine them with your own heartfelt pleas‚ knowing that God hears and responds to those who come to Him with a sincere and humble spirit.

Resources and Further Support

PDF prayer guides offer focused help‚ while community and shared prayer provide strength. Seek counsel from spiritual leaders for lasting freedom.

Prayer against temptation resources are readily available‚ fostering virtue and aiding in overcoming harmful desires through faith and support.

Finding Prayer Guides and PDF Resources

Accessing targeted prayer resources is a vital step in combating lust. Numerous online platforms offer downloadable prayer guides specifically designed to address sexual temptation and foster purity. A readily available option is a “Prayer for Overcoming Lust” document often found in PDF format‚ providing structured prayers and scriptural declarations.

These PDF resources frequently include prayers for releasing oneself from destructive spirits‚ confessing sin‚ and boldly approaching God’s throne for grace‚ referencing scriptures like Hebrews 4:16. They often incorporate declarations based on Romans 1:4‚ seeking the spirit of holiness for sexual purity.

Searching online using keywords like “prayer for sexual purity PDF” or “prayer against lust PDF” will yield a variety of options. Remember to discern the source and ensure the content aligns with sound biblical principles. Utilizing these guides can provide a powerful framework for consistent‚ focused prayer‚ aiding in the journey towards freedom from lustful thoughts and behaviors.

The Role of Community and Shared Prayer

Overcoming lust is rarely a solitary battle; the support of a faith community is invaluable. Shared prayer creates a powerful atmosphere of accountability and encouragement‚ strengthening individuals struggling with temptation. Joining a small group or seeking a prayer partner allows for open communication and mutual support‚ fostering healing and growth.

Praying with others amplifies the impact of individual prayers‚ creating a unified front against spiritual warfare. Sharing struggles within a trusted community‚ alongside utilizing resources like a “prayer for lusting to stop PDF”‚ can dismantle feelings of shame and isolation.

Accountability partners can provide gentle correction and encouragement‚ helping to identify triggers and maintain boundaries. The collective intercession of a community‚ combined with personal prayer and utilizing available PDF guides‚ significantly increases the likelihood of lasting freedom from lustful desires and behaviors.

Seeking Counsel and Support from Spiritual Leaders

Navigating the complexities of lust requires wisdom and guidance often found in experienced spiritual leaders. Pastors‚ counselors‚ or mentors can offer a safe space to confess struggles‚ receive personalized prayer‚ and develop a tailored plan for overcoming temptation. They can also help discern the root causes of lustful thoughts and behaviors.

Spiritual leaders can provide valuable insights into utilizing resources like a “prayer for lusting to stop PDF” effectively‚ ensuring it aligns with biblical principles and personal needs. They can offer accountability‚ helping to maintain commitment to a path of purity and healing.

Remember‚ seeking help is a sign of strength‚ not weakness. A pastor’s experience with moral failures‚ as highlighted in shared counsel‚ demonstrates the importance of seeking guidance. Their support‚ combined with diligent prayer and available resources‚ is crucial for lasting freedom.

instructions for vax steam cleaner

Welcome! This guide unlocks the power of your Vax steam cleaner, offering effective and eco-friendly cleaning. Discover versatile solutions for floors, carpets, and beyond!

Understanding the Benefits of Steam Cleaning

Steam cleaning offers a powerful, chemical-free way to sanitize and refresh your home. Harnessing the natural cleaning power of steam, Vax steam cleaners effectively eliminate dirt, grime, and up to 99.9% of bacteria. This method is ideal for allergy sufferers and families with pets, promoting a healthier living environment.

Beyond sanitation, steam cleaning revitalizes surfaces, leaving them looking fresh and new without harsh residues.

Vax Steam Cleaner Models: A Quick Overview

Vax offers a diverse range of steam cleaners, from lightweight handheld models for quick spot cleaning to robust multi-purpose machines for whole-home sanitation. Popular options include the S85-CM Steam Clean, known for its versatility, and various carpet cleaners with integrated steam functions.

Features vary by model, including variable steam control and specialized attachments for different surfaces.

Unboxing and Initial Setup

Carefully unpack your Vax steam cleaner, verifying all components are present. Prepare for assembly by reviewing the included parts list and diagrams.

Identifying the Components

Your Vax steam cleaner package includes the main unit, a water tank (often removable), various attachments like floor heads, handheld steamers, nozzles, and brushes. Locate the power cord, instruction manual, and potentially a detergent dispenser (model-specific). Familiarize yourself with each part – noting their shape and function – before proceeding with assembly. Refer to the diagrams in your user guide for clear visual identification of every component.

Assembling Your Vax Steam Cleaner

Begin by securely attaching the handle to the main unit, ensuring it clicks firmly into place. Next, connect the chosen attachment – floor head or handheld steamer – to the designated port. Verify a snug fit to prevent steam leakage during operation. If applicable, insert the detergent dispenser. Double-check all connections before filling the water tank, ensuring stability for safe and effective cleaning.

Filling the Water Tank

Ensure the steam cleaner is switched off and unplugged before filling. Locate the water tank and remove it carefully. Fill with distilled or filtered water to the ‘max’ line, avoiding overfilling. Using tap water can lead to scale buildup, reducing efficiency. Replace the tank securely, ensuring a tight seal. Now your Vax is ready for powerful steam cleaning!

Operating Instructions

Begin by connecting the desired attachment. Power on, select your steam level, and enjoy effective cleaning. Always refer to surface-specific guidance!

Powering On and Off

To initiate cleaning, firmly plug the Vax steam cleaner into a grounded electrical outlet. Press the power button – a clear indicator light will illuminate. For shutdown, depress the same power button until the light extinguishes. Always ensure the unit is completely off before refilling the water tank or changing attachments. Disconnecting from the outlet provides an extra safety measure, preventing accidental activation during maintenance or storage.

Steam Level Selection

Vax steam cleaners often feature adjustable steam settings. Lower settings are ideal for delicate surfaces like sealed wood floors or upholstery, minimizing potential damage. Higher settings deliver intense steam for stubborn dirt on tile, grout, or carpets. Consult your model’s specific guide to understand the available levels and their recommended applications. Start with a lower setting and increase as needed for optimal cleaning power.

Using Different Attachments

Maximize your Vax steam cleaner’s versatility by utilizing its attachments! The floor head excels on hard surfaces, while the handheld steamer tackles smaller areas and upholstery. Detailing tools, like nozzles and brushes, are perfect for grout, corners, and tight spaces. Ensure a secure connection before use, and always refer to your model’s manual for specific attachment guidance and safety precautions.

Attachments and Their Uses

Unlock cleaning power! Vax attachments expand functionality – floor heads for large areas, handheld steamers for detail work, and specialized tools for targeted grime removal.

Floor Head Attachment

The floor head is your go-to for hard surfaces and carpets. Ensure the microfiber pad is securely attached for optimal cleaning and glide. Adjust steam levels based on your floor type – lower for delicate wood, higher for tile.

For carpets, a gentle back-and-forth motion effectively lifts dirt and sanitizes fibers. Regularly check and clean the pad to maintain peak performance and prevent re-depositing grime. This attachment transforms floor care!

Handheld Steamer Attachment

The handheld steamer offers targeted cleaning power! Perfect for grout, faucets, and smaller areas, it provides precision and convenience. Attach appropriate nozzles for focused steam delivery.

Use short bursts of steam to avoid saturation, especially on delicate surfaces. Always test in an inconspicuous area first. This versatile tool sanitizes and removes grime from hard-to-reach spots, making quick cleanups effortless.

Detailing Tools (Nozzles, Brushes)

Maximize your Vax’s cleaning potential with detailing tools! Nozzles concentrate steam for precise cleaning of grout lines and tight spaces. Brushes offer gentle scrubbing action, ideal for loosening dirt on surfaces like ovens or shower doors.

Select the appropriate tool based on the surface and soil level. Always test in a hidden area first to ensure compatibility and prevent damage. These attachments enhance sanitization and grime removal.

Cleaning Different Surfaces

Adapt your Vax! Steam cleans hard floors, carpets, and upholstery effectively. Adjust settings and attachments for optimal results on each unique surface.

Hard Floors (Tile, Wood, Laminate)

For tile and laminate, use the floor head attachment with a low-to-medium steam setting to avoid damage. On sealed wood floors, test in an inconspicuous area first! Employ a gentle sweeping motion, overlapping each pass. Avoid prolonged exposure to high heat, which could potentially warp or discolor wood. Regularly clean the floor head to prevent streaks and ensure optimal performance. Remember, less is often more when steam cleaning delicate surfaces.

Carpets and Rugs

For carpets and rugs, utilize the appropriate floor head attachment and select a medium-to-high steam setting for effective dirt removal. Work in slow, overlapping strokes, allowing the steam to penetrate the fibers. Avoid over-saturating the carpet, as this can lead to mildew. For delicate rugs, test a hidden area first. Regularly check and empty the water tank for continuous cleaning power.

Upholstery Cleaning

To clean upholstery, employ the handheld steamer attachment with a suitable fabric-safe nozzle or brush. Always test on an inconspicuous area first to ensure colorfastness. Use a low-to-medium steam setting to avoid damage. Maintain a consistent distance to prevent over-wetting. Allow the upholstery to air dry completely before use, ensuring proper ventilation for optimal results.

Maintenance and Care

Regular upkeep ensures peak performance! Descale frequently, clean attachments after each use, and store your Vax steam cleaner properly for longevity.

Descaling the Steam Cleaner

Descaling is crucial for maintaining optimal steam production and extending the life of your Vax steam cleaner. Mineral buildup from water can reduce efficiency. Follow these steps: use a descaling solution (Vax recommends their own, or diluted white vinegar). Run the solution through the steam cleaner according to the model’s instructions, then rinse thoroughly with clean water. Repeat if necessary, ensuring no descaling solution remains before use.

Cleaning the Attachments

Regular attachment cleaning ensures hygienic and effective steam cleaning. After each use, allow attachments to cool completely. Wipe down surfaces with a damp cloth, removing any residue. For stubborn grime, use a mild detergent. Check nozzles and brushes for blockages, clearing them with a small pin or wire. Ensure attachments are fully dry before reattaching to the main unit.

Storing Your Vax Steam Cleaner

Proper storage extends your Vax steam cleaner’s lifespan. Always ensure the unit is completely cool and dry before storing. Empty the water tank to prevent mildew. Securely wrap the power cord. Store in a cool, dry place, away from direct sunlight and extreme temperatures. Keep attachments together for easy access during the next cleaning session.

Troubleshooting Common Issues

Facing problems? This section provides solutions for heating, leaks, and clogged nozzles, ensuring your Vax steam cleaner operates at peak performance.

Steam Cleaner Not Heating Up

If your Vax isn’t heating, first ensure it’s correctly plugged into a working outlet. Check the power switch is fully engaged. A descaling cycle might be needed if mineral buildup prevents heating.
Verify the water tank is adequately filled – some models won’t heat with insufficient water. If issues persist, consult the Vax support website for model-specific guidance or contact their customer service team.

Water Leaks

Discovering leaks? First, confirm the water tank is securely fastened and properly sealed. Inspect the tank for cracks or damage. Ensure attachments are firmly connected; loose fittings are a common cause. A clogged nozzle can also increase pressure, leading to leaks. If the leak continues, immediately unplug the Vax and contact Vax support for assistance, potentially requiring a repair or replacement part.

Clogged Nozzles

Experiencing reduced steam flow? Clogged nozzles are a frequent issue. First, power off and unplug your Vax steam cleaner. Carefully detach the affected nozzle and inspect for mineral buildup or debris. Use a small pin or wire to gently clear any obstructions. For stubborn clogs, soak the nozzle in a descaling solution before rinsing thoroughly. Regular cleaning prevents future blockages!

Safety Precautions

Prioritize safety! Avoid burns by directing steam away from yourself and others. Ensure proper ventilation and electrical safety during operation.

Avoiding Burns and Scalds

Steam is incredibly hot! Always direct the steam away from yourself, children, and pets. Never touch the steam nozzle or hot surfaces during or immediately after use. Utilize attachments to create distance. Be cautious when cleaning downwards, as steam can run along surfaces. Allow surfaces to cool before touching. Wear appropriate footwear to protect your feet.

Electrical Safety

Prioritize safety! Always ensure the power cord is undamaged and avoid using extensions if possible. Never operate the steam cleaner with wet hands or near water sources. Before plugging in, verify the voltage matches your outlet. Unplug the device when not in use and during maintenance. Do not attempt to repair it yourself; seek professional help.

Proper Ventilation

Ensure adequate airflow! Steam cleaning releases moisture into the air, so maintain good ventilation by opening windows or using a fan. This prevents condensation buildup and ensures a comfortable cleaning environment. Avoid using the steam cleaner in enclosed, poorly ventilated spaces for extended periods. Proper ventilation is crucial for safe operation.

Advanced Features (Model Specific)

Explore enhanced cleaning! Some Vax models offer variable steam control and integrated detergent dispensers for customized, powerful cleaning experiences.

Variable Steam Control

Adjust steam output for optimal results! Variable steam control allows you to tailor cleaning power to different surfaces. Lower settings are ideal for delicate fabrics and sealed hard floors, preventing damage. Higher settings tackle stubborn grime on tiles and heavily soiled carpets. Experiment to find the perfect balance, ensuring effective cleaning without risking material integrity. This feature maximizes versatility and efficiency, providing a customized cleaning experience;

Integrated Detergent Dispenser

Boost cleaning power with the built-in dispenser! Certain Vax models feature an integrated detergent dispenser, allowing you to add specialized cleaning solutions directly into the steam flow. This enhances stain removal and sanitization, particularly on carpets and upholstery. Always use Vax-approved detergents to avoid damaging the machine or surfaces. Follow the manufacturer’s instructions for proper dilution and usage for optimal results.

Finding Replacement Parts

Keep your Vax running smoothly! Genuine parts are available through the official Vax website or authorized retailers, ensuring compatibility and performance.

Vax Website and Support

For direct assistance, the official Vax website is your primary resource. Here, you can register your appliance, download detailed manuals, and access a comprehensive FAQ section addressing common issues.

Need further help? Vax provides online chat support and a dedicated customer service phone line. Locate your model’s specific support page for tailored guidance and replacement part ordering.

Third-Party Retailers

Beyond the official Vax site, numerous retailers carry Vax steam cleaner parts and accessories. Platforms like eBay offer both new and used components, potentially providing cost-effective solutions for repairs or replacements.

However, exercise caution when purchasing from third parties. Verify seller ratings and ensure compatibility with your specific Vax model before completing your purchase to avoid issues.

Understanding Model and Serial Numbers

Locate these details on your Vax steam cleaner for accurate support, warranty claims, and to ensure you order the correct replacement parts.

Locating the Information

Finding your Vax steam cleaner’s model and serial number is straightforward. Typically, a sticker or plate is affixed to the rear of the unit, or underneath the water tank. This label clearly displays both identifiers. Record these numbers immediately after purchase, as they are crucial for accessing warranty services, obtaining specific support, and ensuring compatibility when ordering replacement components. Keep this information readily available!

Importance for Support and Warranty

Your Vax steam cleaner’s model and serial number are vital for efficient support and warranty claims. When contacting Vax customer service, having these details expedites the process. They verify your purchase date and model specifics. Warranty coverage relies on accurate identification; without it, claims may be delayed or denied. Protect your investment by keeping these numbers safe and accessible!

Steam Cleaner vs. Carpet Cleaner

Steam cleaners sanitize with heat, while carpet cleaners use water and detergents. Choose steaming for general cleaning and carpet cleaning for deep stain removal.

Key Differences and When to Use Each

Steam cleaners excel at sanitizing hard surfaces and refreshing carpets using only water, reducing chemical reliance. They’re ideal for quick cleans and allergy sufferers. Carpet cleaners, however, employ detergents and agitation for deep cleaning, tackling embedded dirt and stubborn stains. Use a carpet cleaner for heavily soiled areas or periodic deep cleans, and a steam cleaner for lighter, more frequent sanitization and surface refreshment.

Eco-Friendly Cleaning with Steam

Steam cleaning drastically reduces the need for harsh chemicals, promoting a healthier home environment and sustainable cleaning practices for you and the planet.

Reducing Chemical Usage

Vax steam cleaners offer a powerful alternative to traditional cleaning methods reliant on strong chemicals. Utilizing only water, the high-temperature steam effectively dissolves dirt, grime, and bacteria. This significantly minimizes your household’s exposure to potentially harmful substances, creating a safer environment for families and pets. Embrace a healthier, more eco-conscious approach to maintaining a spotless home, reducing your carbon footprint with each clean!

Sustainable Cleaning Practices

Extend your Vax steam cleaner’s lifespan through mindful maintenance and responsible usage. Regularly descaling prevents mineral buildup, ensuring optimal performance and reducing energy consumption. Choosing reusable microfiber pads over disposable options minimizes waste. By embracing these practices, you contribute to a circular economy, lessening environmental impact and promoting a truly sustainable cleaning routine for a healthier planet.

hoover h dry 300 manual pdf

Hoover H-Dry 300 Manual PDF: A Comprehensive Guide

Discover essential guidance for your appliance! This detailed PDF manual unlocks the full potential of the Hoover H-Dry 300‚
covering installation‚ operation‚ and troubleshooting. Download and explore today!

Congratulations on selecting the Hoover H-Dry 300! This tumble dryer represents a blend of innovative technology and practical design‚ aimed at simplifying your laundry routine. This introduction serves as your starting point for understanding the dryer’s capabilities and ensuring optimal performance. The H-Dry 300 is engineered to efficiently and gently dry your clothes‚ preserving fabric quality while minimizing energy consumption.

Before first use‚ carefully review this manual to familiarize yourself with the dryer’s features‚ safety precautions‚ and operating instructions. Understanding these aspects will contribute to a longer lifespan for your appliance and a more satisfying user experience. The manual provides a roadmap to successful operation‚ including a dedicated troubleshooting section to address common issues.

This guide will empower you to maximize the benefits of your new Hoover H-Dry 300‚ offering a seamless and convenient laundry experience.

Where to Download the H-Dry 300 Manual PDF

Accessing the official Hoover H-Dry 300 manual in PDF format is straightforward. Several online resources provide convenient downloads. Begin by visiting the official Hoover website and navigating to the support section. Utilize the search function‚ entering “H-Dry 300” to locate the specific model page. The PDF manual is typically available for direct download from this page.

Alternatively‚ numerous third-party websites archive appliance manuals‚ including dedicated support pages for Argos products (specifically model 786/9952). These sites often host the manual for easy access. Ensure the downloaded file originates from a reputable source to guarantee its authenticity and safety. A quick online search for “Hoover H-Dry 300 manual PDF” will yield multiple download options.

Download today for comprehensive guidance!

Understanding the Manual’s Contents

The Hoover H-Dry 300 manual PDF is meticulously structured to guide users through every aspect of the appliance. It begins with crucial safety information and important precautions‚ ensuring safe operation. Subsequent sections detail the installation process‚ covering unpacking‚ positioning‚ and power connection. A comprehensive overview of the control panel explains each function and setting.

Detailed instructions are provided for selecting appropriate drying programs based on fabric type and desired dryness level. The manual also covers loading and unloading procedures‚ alongside essential maintenance tasks like lint filter cleaning and condenser care (if applicable). A dedicated troubleshooting section addresses common issues‚ including non-starting or non-heating problems‚ and explains error codes.

Finally‚ technical specifications‚ such as dimensions‚ weight‚ and energy consumption‚ are included for reference.

Installation and Setup

Prepare your laundry room! This section details unpacking‚ proper dryer positioning‚ and secure connection to a suitable power supply for optimal performance.

Unpacking and Initial Inspection

Carefully unpack your new Hoover H-Dry 300‚ ensuring you have ample space to avoid damaging the appliance or your surroundings. Retain the original packaging materials for potential future transport or warranty claims. Thoroughly inspect the dryer for any visible signs of damage incurred during shipping‚ such as dents‚ scratches‚ or broken components.

Check all included accessories against the packing list – this typically includes the dryer itself‚ a drainage hose (if applicable for condenser models)‚ and this very manual! Report any missing or damaged parts to the retailer immediately. Before proceeding‚ remove all protective films and transport bolts‚ which secure the drum during transit. Failure to remove these bolts can cause significant noise and damage during operation. Refer to the diagrams in this manual for the precise location of these bolts and the correct removal procedure.

Positioning the Dryer

Select a stable‚ level floor to position your Hoover H-Dry 300‚ capable of supporting its weight‚ especially when fully loaded with laundry. Ensure adequate ventilation around the dryer; maintain a minimum clearance of several inches on all sides to prevent overheating and ensure efficient operation. Avoid placing the dryer in direct sunlight or near sources of heat or moisture.

Confirm the floor surface is clean and dry before installation. The dryer should not be placed on carpeting or rugs‚ as this can obstruct airflow. Consider the proximity to a suitable power outlet and‚ if applicable‚ a drainage point for condenser models. Ensure easy access for maintenance and cleaning‚ particularly the lint filter and condenser. Proper positioning contributes to optimal performance and longevity of your appliance.

Connecting to Power Supply

Before connecting‚ verify the voltage and frequency of your power supply match the specifications listed on the dryer’s rating plate – typically 220-240V‚ 50Hz. Use a dedicated‚ grounded electrical outlet with the appropriate amperage to prevent overloading the circuit. Never use extension cords or adapters‚ as they can pose a safety hazard.

Ensure the power outlet is easily accessible‚ allowing for quick disconnection in emergencies. Inspect the power cord for any damage before plugging it in; do not use the dryer if the cord is frayed or damaged. Confirm the outlet is properly earthed to minimize the risk of electric shock. Always switch off the dryer at the outlet when not in use or during maintenance.

Operating Instructions

Master your H-Dry 300! Learn to navigate the control panel‚ select optimal drying programs‚ and efficiently load/unload laundry for perfect results.

Control Panel Overview

The Hoover H-Dry 300’s control panel is designed for intuitive operation‚ offering a range of drying options. Typically‚ you’ll find a program selector dial allowing you to choose from pre-set cycles like ‘Cotton’‚ ‘Delicates’‚ ‘Synthetics’‚ and ‘Wool’. Digital displays often indicate remaining drying time and cycle status. Buttons control functions such as ‘Start/Pause’‚ ‘Delay Start’‚ and temperature settings.

Additional features may include options for adjusting dryness levels (e.g.‚ ‘High’‚ ‘Medium’‚ ‘Low’) and specialized programs like ‘Iron Dry’ or ‘Anti-Crease’. Indicator lights alert you to important statuses‚ such as when the water container is full or the lint filter requires cleaning. Familiarizing yourself with these controls ensures optimal performance and tailored drying for various fabric types. Refer to the manual for specific button functions and program details.

Selecting Drying Programs

Choosing the correct drying program is crucial for garment care and energy efficiency. The Hoover H-Dry 300 manual details specific programs for different fabric types. For cottons‚ use a higher heat setting‚ while delicates require a gentle‚ low-temperature cycle. Synthetics benefit from medium heat‚ preventing damage. A ‘Wool’ program utilizes even lower temperatures to avoid shrinkage.

Consider the dryness level desired – ‘Iron Dry’ leaves clothes slightly damp for easier ironing‚ while ‘Cupboard Dry’ is ready for immediate storage. Utilize the ‘Time Dry’ option for specific drying durations‚ ideal for small loads or freshening items. Always check garment care labels before selecting a program. Proper program selection extends clothing life and optimizes dryer performance‚ as outlined in the PDF manual.

Loading and Unloading Laundry

Proper loading ensures efficient drying and prevents damage to clothes. The Hoover H-Dry 300 manual advises against overloading the drum; leave sufficient space for items to tumble freely. Distribute the load evenly to maintain balance and reduce noise. Before loading‚ check pockets for objects that could cause damage or a fire hazard.

After the cycle completes‚ promptly remove laundry to prevent wrinkles and mildew. Carefully inspect for any remaining moisture; if needed‚ run a short ‘Refresh’ cycle. Always ensure the dryer is completely cool before unloading. Refer to the manual for guidance on handling specific fabrics. Following these guidelines‚ detailed in the PDF‚ maximizes dryer performance and garment care.

Maintenance and Care

Regular upkeep‚ as detailed in the H-Dry 300 manual PDF‚ ensures optimal performance and longevity. Prioritize lint filter and condenser cleaning for efficiency!

Cleaning the Lint Filter

Maintaining a clean lint filter is crucial for the efficient operation and safety of your Hoover H-Dry 300. The manual PDF emphasizes this point repeatedly‚ highlighting that a clogged filter restricts airflow‚ increasing drying times and potentially posing a fire hazard. Locate the lint filter – typically found inside the dryer door or in a designated slot – and remove it carefully.

Gently remove the accumulated lint by hand or with a soft brush. Avoid using water or harsh chemicals for cleaning. Ensure the filter is completely dry before reinserting it into the dryer. The H-Dry 300 manual PDF recommends cleaning the lint filter after every load to maximize performance and prevent issues. Regular cleaning also contributes to energy savings and extends the lifespan of your appliance. Ignoring this simple maintenance task can lead to decreased efficiency and potential safety risks.

Cleaning the Condenser (if applicable)

Consult your Hoover H-Dry 300 manual PDF to confirm if your model features a condenser unit. If present‚ the condenser requires periodic cleaning to maintain optimal drying performance. The manual details the location of the condenser‚ usually accessible from the front or bottom of the dryer. Carefully remove the condenser following the instructions in the PDF.

Use a vacuum cleaner with a brush attachment to gently remove dust and debris from the condenser fins. Avoid using water or cleaning solutions‚ as these can damage the unit. The manual PDF stresses the importance of handling the condenser with care to prevent bending or breaking the delicate fins. Reinstall the condenser securely after cleaning. Regular condenser cleaning‚ as outlined in the manual‚ ensures efficient moisture removal and prevents reduced drying capacity.

Exterior Cleaning

Refer to your Hoover H-Dry 300 manual PDF for specific cleaning recommendations. Generally‚ the dryer’s exterior can be cleaned with a damp cloth and mild detergent. Always disconnect the dryer from the power supply before cleaning. Avoid abrasive cleaners or scouring pads‚ as these can damage the finish. The manual PDF emphasizes wiping up any spills immediately to prevent staining or corrosion.

Pay particular attention to the control panel‚ gently wiping away any dust or residue. The manual PDF may suggest a specific cleaning solution for the control panel‚ if needed. Ensure the dryer is completely dry before reconnecting it to the power supply. Regular exterior cleaning‚ as detailed in the manual‚ helps maintain the dryer’s appearance and prevents the buildup of dirt and grime‚ contributing to its longevity.

Troubleshooting Common Issues

Consult the Hoover H-Dry 300 manual PDF for solutions! Find guidance on issues like the dryer not starting or heating‚ and decode error codes.

Dryer Not Starting

If your Hoover H-Dry 300 isn’t powering on‚ the manual PDF provides a systematic approach to diagnosis. First‚ verify the dryer is correctly plugged into a functioning power outlet; test the outlet with another appliance. Next‚ check the circuit breaker or fuse box to ensure the circuit hasn’t tripped or blown.

The manual details how to inspect the door latch mechanism – a common culprit‚ as the dryer won’t start if the door isn’t securely closed. Additionally‚ it guides you through checking the start/pause button and control panel for any accidental lock-out features. Refer to the error code section if any indicators are illuminated‚ as these can pinpoint the issue. Finally‚ the PDF outlines safety precautions before attempting any internal inspections‚ advising against self-repair if you’re uncomfortable.

Dryer Not Heating

Should your Hoover H-Dry 300 fail to generate heat‚ the manual PDF offers troubleshooting steps. Begin by confirming the selected drying program includes a heating element; some programs utilize cool air cycles. Next‚ the manual instructs you to check the lint filter – a clogged filter restricts airflow and can trigger a safety shut-off.

Crucially‚ it details how to inspect the condenser (if your model has one) for blockage‚ as this significantly impacts heating performance. The PDF also guides you through identifying potential error codes related to heating element failure or thermostat issues. Remember to disconnect the dryer from the power supply before any inspection. If the problem persists‚ the manual advises contacting qualified service personnel for repair‚ emphasizing safety and avoiding self-repair of electrical components.

Error Codes and Their Meanings

The Hoover H-Dry 300 manual PDF provides a comprehensive list of error codes displayed on the control panel. These codes are crucial for diagnosing issues‚ preventing unnecessary service calls. For example‚ a code might indicate a blocked vent‚ a faulty temperature sensor‚ or a problem with the motor.

The manual details each code’s specific meaning and suggests initial troubleshooting steps you can take. It emphasizes that some errors require professional attention. Understanding these codes empowers users to quickly identify problems and communicate them effectively to a technician. The PDF’s clear explanations ensure even non-technical users can interpret the dryer’s signals‚ maximizing efficiency and minimizing downtime. Always refer to the manual for the most accurate and up-to-date code definitions.

Safety Information

Prioritize safety! The Hoover H-Dry 300 manual PDF details crucial precautions‚ including electrical guidelines and the child safety lock feature‚ ensuring secure operation.

Important Safety Precautions

Before operating your Hoover H-Dry 300‚ carefully review the safety precautions outlined in the manual PDF. Always ensure the dryer is properly grounded to prevent electrical shock. Never operate the dryer if the power cord is damaged; it must be replaced by a qualified technician.

Do not dry items that have been exposed to flammable substances‚ such as gasoline or cleaning solvents. Keep the surrounding area clear of combustible materials. Regularly clean the lint filter before each use to prevent fire hazards. Avoid overloading the dryer‚ as this can affect performance and pose a safety risk.

Disconnect the dryer from the power supply before performing any maintenance or cleaning. Never attempt to repair the dryer yourself; contact authorized service personnel for assistance. Supervise children when they are near the dryer‚ and ensure they understand the potential hazards. Follow all warnings and instructions provided in the manual for safe and efficient operation.

Child Safety Lock Feature

The Hoover H-Dry 300 incorporates a valuable Child Safety Lock feature‚ enhancing security and preventing accidental operation by young children. Consult your manual PDF for specific activation instructions‚ as the process may involve a button combination on the control panel.

Once activated‚ the lock disables the control buttons‚ rendering the dryer inoperable without deactivation. This prevents unintended program changes or starts‚ safeguarding children from potential hazards. Remember to deactivate the lock when you intend to use the dryer.

The manual PDF provides a clear visual guide to locating the relevant buttons and understanding the lock’s indicator light. Prioritize child safety by familiarizing yourself with this feature and utilizing it whenever children are present. Regularly check the manual for updates or specific instructions related to the lock function.

Electrical Safety Guidelines

Prioritize safety when installing and operating your Hoover H-Dry 300. The manual PDF emphasizes the importance of a properly grounded electrical outlet‚ matching the dryer’s voltage requirements. Never use extension cords or adapters‚ as they can pose a fire risk;

Ensure the power cord is undamaged and free from kinks or abrasions. If the cord is damaged‚ it must be replaced by a qualified technician. Avoid operating the dryer in damp environments or with wet hands. Always disconnect the dryer from the power supply before cleaning or performing maintenance.

The manual PDF details specific grounding instructions and warns against modifying the plug. Adhering to these guidelines minimizes the risk of electrical shock and ensures safe operation. Consult a qualified electrician if you have any doubts regarding the electrical installation.

Technical Specifications

Explore detailed dimensions‚ weight‚ drum capacity‚ and energy consumption data within the Hoover H-Dry 300 manual PDF for optimal understanding.

Dimensions and Weight

Understanding the physical specifications of your Hoover H-Dry 300 is crucial for proper placement and installation within your laundry room. The official manual PDF provides precise measurements‚ ensuring a seamless fit. Typically‚ these dryers are designed with consideration for standard laundry spaces‚ but variations exist between models.

Refer to the documentation for exact height‚ width‚ and depth dimensions. Weight is also a key factor‚ particularly when considering floor load capacity and ease of movement during maintenance. The manual will specify the dryer’s total weight‚ both empty and potentially with a full load‚ aiding in safe handling. Accurate dimensions prevent installation issues and ensure optimal dryer performance.

Always consult the official Hoover H-Dry 300 manual PDF for the most accurate and up-to-date information regarding dimensions and weight‚ as specifications can vary.

Energy Consumption

Understanding the energy consumption of your Hoover H-Dry 300 is vital for managing household expenses and minimizing environmental impact. The official manual PDF details the dryer’s energy efficiency rating‚ providing insights into its power usage during various drying cycles.

Information within the manual will typically include kilowatt-hour (kWh) consumption per cycle‚ allowing you to estimate running costs. It may also highlight energy-saving features and recommend optimal settings for reduced energy use. Checking the energy label and the manual’s specifications helps you compare the H-Dry 300’s efficiency with other models.

Proper maintenance‚ such as regular lint filter cleaning‚ also contributes to optimal energy performance. Always refer to the official Hoover H-Dry 300 manual PDF for precise energy consumption data and guidance on maximizing efficiency.

Drum Capacity

Determining the drum capacity of your Hoover H-Dry 300 is crucial for efficient laundry drying; The official manual PDF clearly specifies the dryer’s drum size‚ typically measured in kilograms (kg). This indicates the maximum weight of laundry the dryer can effectively handle in a single cycle.

Consulting the manual ensures you don’t overload the dryer‚ which can lead to inefficient drying and potential damage. Understanding the capacity helps you sort laundry appropriately and optimize drying performance. The H-Dry 300’s drum capacity is often around 10kg‚ but always verify this information within the official documentation.

Properly utilizing the drum capacity contributes to energy savings and extends the lifespan of your appliance. Refer to the Hoover H-Dry 300 manual PDF for precise capacity details and loading recommendations.